How to Use Machine Learning to Improve Your Digital Marketing

Machine learning is on the verge of transforming the marketing sector. In many ways, it’s already started. According to Gartner, 30% of companies will use machine learning in one part of their sales process by 2020.
What’s more, these companies are using machine learning to get ahead of competitors by tackling some of marketing’s toughest challenges, such as personalization, instant customer support, and big data.
In other words, machine learning isn’t just for computer scientists. Marketers should sit up and take notice. Below, I’ve covered five ways you can use machine learning to supercharge your digital marketing efforts.
What Is Machine Learning?
Before we get into the marketing side of things, let’s take a second to establish what artificial intelligence and machine learning are.
Artificial intelligence is simply any form of intelligence demonstrated by a machine instead of the natural intelligence displayed in humans and animals. When most people think of artificial intelligence, they think specifically of computers that replicate some level of human intelligence, like a chess-playing computer I mentioned in the introduction.
Machine learning is a branch of artificial intelligence that enables systems to find new and better solutions automatically by learning from mistakes and experiences. The more data and experience a machine learning algorithm has access to, the better it becomes in the future.
Machine learning systems can largely be divided into two subsets: guided and unguided. Guided machine learning systems are supplied with data sets and solutions by humans in the first instance. They are taught which patterns to look for initially and will then get better at identifying those patterns going forward.
Unguided systems are given access to unsorted and disparate data sets and are left to decipher patterns independently without guidance from humans. Unguided systems will create an algorithm and then look for ways to improve it going forward.
Using Machine Learning to Improve Your Marketing
We know that marketing teams don’t want for lack of data. Marketers struggle with making sense of all the data they have at their fingertips and then putting that data to use. This analysis is where machine learning comes in.
The primary reason to add machine learning to your marketing stack is that it can make sense of vast amounts of data much faster and much more effectively than humans.
Machine learning can use data to identify patterns and make predictions almost instantly. Marketers can then use these insights to optimize a huge portion of their workflow, from running more tests and improving their website’s UX to personalizing the customer experience and automating consumer engagement.
The long and short of it is machine learning can be used to improve just about every part of your digital marketing efforts. Below we discuss five of the most important ways.
Analyze Data Sets
However you use machine learning in your marketing efforts, the process will probably begin by analyzing data sets.
For instance, machine learning can be used to analyze and find user activity patterns on your website. Rather than sifting through data in your Google Analytics profile yourself, a machine learning algorithm could do the job in seconds, predicting future user behavior and identifying patterns that you can use to optimize your site.
Sure, humans are perfectly capable of analyzing data themselves, but you can’t do it half as fast or accurately as AI-powered solutions.
Marketers can also use machine learning to gain a better understanding of their customer base.
Take customer segmentation, for instance. Dividing up your audience into different groups can make your marketing efforts much more effective, but it’s time-consuming to do so yourself. On the other hand, a machine learning algorithm could automatically segment your customer base based on actions and behavioral patterns that you couldn’t hope to identify.
Create and Optimize Content
You don’t need me to reiterate the importance of content in your digital marketing efforts. However, you may need clarification on how machine learning can improve what you write and publish and why using machine learning in your content marketing strategy is essential.
For starters, machine learning can help your articles rank higher in search engine results. It’s one thing to be a great writer; it’s another to write in a way that pleases Google, so it rewards you in the SERPs. You need to make sure you use all relevant keywords, discuss every relevant topic, and cover all of your bases in general.
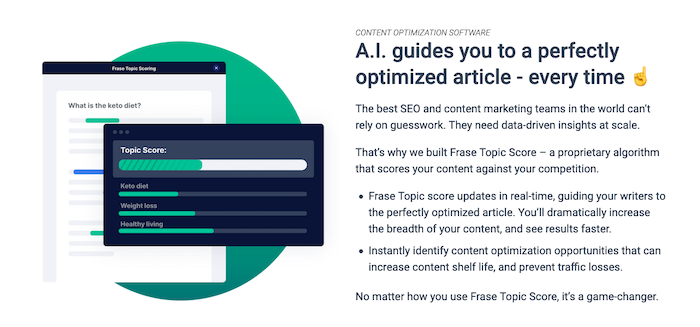
That’s pretty hard to do without smart content creation tools like Frase.io, which uses machine learning to compare your content against Google’s top results and make sure you hit all of the relevant points.
Second, you can have machine learning algorithms write content for you. Phrasee is an AI-powered copywriting tool that uses machine learning to create email subject lines and push notifications that its algorithm believes will drive the highest ROI.

You can even use AI to help you curate content for your customers. Curata offers a machine learning content curation software that helps marketers find and publish the most relevant and engaging content for their audiences.

Increase Personalization
Personalization matters for consumers. Research by Accenture shows 91% of consumers prefer brands that remember who they are and provide relevant offers and recommendations as a result. What’s more, if they don’t get a personalized experience, over half of consumers are only too happy to switch to a competitor.
Here’s the good news: machine learning lets you deliver the most personalized customer experience possible. You can employ a machine learning algorithm that tracks user behavior on a granular level, learns what products they like, and creates a personalized homepage and recommendation list as a result.
Amazon, for instance, uses AI algorithms that take into account the purchase history of users, the items in their cart, and their viewing habits to offer the product recommendations that are most likely to convert.
The same algorithm could also generate personalized offers for every customer and email them to consumers when they are most likely to purchase.
Improve Marketing Automation
Better personalization is one way machine learning can transform how your brand engages customers, but it’s not the only way. AI and machine learning can also be used to better automate your marketing efforts and significantly improve customer engagement as a result.
Let’s say you automatically send an email to customers when they sign up for your newsletter or abandon their cart. While most brands will send a generic email, companies that adopt machine learning can tailor content and offers based on that consumer’s browsing history. If they looked at your brand’s range of dog toys before signing up for your newsletter, a relevant offer on chew toys would make them much more likely to re-engage with your brand.
For SaaS brands, AI-powered marketing automation tools can analyze much larger and disparate data sets to better segment leads. This allows sales reps to prioritize those leads that are much more likely to convert.
Marketing automation is incredibly powerful. According to Invesp, marketing automation leads to an over 14% increase in sales productivity and an over 12% reduction in marketing overhead.
It’s entirely possible to do this without machine learning, but AI makes your automation efforts much more personalized and much more powerful.
Utilize Chatbots
Chatbots are a powerful customer service tool. Eight out of ten consumers who have engaged with them report a positive experience. If you run an online business, they are all but essential.
With chatbots, you don’t have to have a human on-hand to respond to consumers. Instead, machine learning-powered chatbots can automatically answer consumer queries with a scarily-high rate of accuracy. That’s because your chatbot will learn from your website’s content and the conversations it has with consumers to constantly improve the answers it provides.
Because the chatbot is continuously learning and improving itself, it will deliver an even better customer experience with more conversations. You may want to have your chatbot pass an incredibly complicated query onto a human at first, but soon the bot will become so effective there’ll be no need for a human to interject. Eventually, you’ll have a smart enough chatbot to upsell the consumer, not just answer their questions.
Consumers probably won’t be able to tell they’re speaking to a robot, either. Some chatbots, like IntelliTicks, employ another branch of AI, Natural Language Processing (NLP), to have human-level conversations with customers.
What’s more, data gathered by AI-powered chatbots can be analyzed by another machine learning algorithm to generate insights that marketers can use to optimize their efforts going forward.
What is the Future of Machine Learning?
Things move fast in the world of machine learning. Expect advances in marketing AI to happen rapidly.
Improved unsupervised machine learning algorithms are in development right now, for instance. These algorithms don’t need input from humans at the start, making them much easier and faster for marketers to implement.
Personalization will become even more powerful, too. Machine learning algorithms will become better at discerning what consumers want for one, but the ways they can be integrated with online stores will improve, too. Soon, marketers will be able to customize every part of their sites for individual users, much like social media timelines are personalized for every user.
Finally, expect big advances in mobile machine learning. AI-powered digital assistants will become a more prominent part of our life, and marketers will have to develop strategies to contend with this. Mobile applications will also be able to integrate machine learning features in the same way websites can right now.
Don’t get overwhelmed, however. Before you start worrying about what the future holds, work your way through the suggestions I’ve made above first. You’ll then be ready for whatever occurs in the future.
Conclusion
It’s clear: machine learning can transform your digital marketing efforts.
Don’t rush into the world of machine learning, however. Adopting solutions without first understanding how the technology works and its role in your company will typically do more harm than good.
Machine learning is powerful, but it isn’t a silver bullet. Adopt one solution at a time, however, and you’ll be fine.
Continue your education by reading my articles on AI’s role in SEO and AI-powered digital assistants.
Which machine learning strategy are you going to implement first?
The post How to Use Machine Learning to Improve Your Digital Marketing appeared first on Neil Patel.
Best Inventory Management Software

Disclosure: This content is reader-supported, which means if you click on some of our links that we may earn a commission.
Getting the right goods to the right place, at the right time, and in the right condition is a crucial prerequisite for running a successful business.
But how is it supposed to happen if you end up selling an item that wasn’t actually in stock?
Or the sold item gets misplaced?
This is why you must know where your inventory is, how much you have, and how to get where it needs to go. Even better if all this is possible without any extra effort from you.
Getting the best inventory management software for your business will make all of it a reality.
And if that isn’t enough, the software tool can also help you reduce operating costs, increase revenue, and most importantly, ensure greater customer satisfaction.
But how do you know which platform you should choose?
That’s where we come in.
Our team at has curated a list of the best inventory management solutions for different types of businesses below. Read on to find out the best match for your company.
The Top Five Options for the Best Inventory Management Software:
- Cin7 — Best for Enterprise Resource Planning
- QuickBooks Commerce — Best for Wholesale Business
- Upserve — Best for Restaurants
- Zoho Inventory — Best for Multi-Channel Retailers
- Ordoro — Best for eCommerce Websites
How to Choose the Best Inventory Management Software for You
An inventory management software is more than a solution – it’s a savior for your business.
You can systematically source, store, and sell inventory, for both raw materials and finished products. It also covers the entire supply chain, from production to retail and warehousing to shipping, plus any stock movement in between.
The good news is that the software is a one-time investment, but you need to make the right decision. To ensure this, keep the following factors in mind before making your final choice.
Business Type and Requirements
Although inventory management software is versatile, only a few cater to specific niche industry initiatives and business models.
Think about it: The inventory requirements of a wholesaler differ a lot from those of a physical retailer.
Moreover, every business has its unique needs, and your business is no different. You have to be aware of the kind of features you require in software for your inventory process’s smooth functioning.
Do you sell your offerings in-person or online? Is it through a website or online marketplaces–or a combination of the two?
A prospective software may offer several innovative features and support various sales channels, but if it doesn’t have the features you need or back the sales channel you currently use, buying it would be useless.
Possible Integrations
Many inventory management software tools can integrate with other platforms, which helps you save time and ensure smoother operations when it comes to inventory management.
Before choosing a tool, find out whether the prospective software plays well with the other solutions you already use and pay for.
Imagine you sell products on Amazon. Understandably, you’ll want to keep a record of your listed stocks in real-time. Make sure you cross-check that the solution you want to purchase can integrate with Amazon. If it can’t, move on and look for other options.
Process Automation
The rule here is simple: Choose a software that offers as many relevant automated features as possible. After all, the whole point of getting inventory management software is to make our lives easier.
Think through each step of your inventory management process to determine what could be automated and what has to be done manually.
For example, automatically reordering more units when you’re low on inventory. Or updating your inventory according to purchase orders and fulfillment. This, of course, will be done based on the settings you customize in the software you choose.
Customer Support
There’s no guarantee there won’t be any learning curve with the inventory management software you choose. Therefore, you may benefit from some expert advice from your software vendor in the beginning, after an upgrade, or when you face a glitch. Look for online resources, live chats, and other customer support tools they offer.
Make a point to choose a company that has a reputation for providing exemplary customer service. Don’t forget to read customer reviews and feedback before initiating a purchase.
The Different Types of Inventory Management Software
In addition to the above factors, you must also understand the different inventory management types to make the right choice.
From free and basic tool suites to ones that are more expensive and have super-accurate programs, inventory management software varies a lot. You can also categorize them according to their features, as some tools do nothing but list orders, while others facilitate sales departments to track and categorize orders, give dynamic product information, and carry out personalized branding.
But since it’s a software we’re discussing, we’ve listed the different inventory management software types depending on how the vendor deploys it.
There are three kinds of inventory management software based on deployment.
On-Premise Inventory Management Systems
These systems include software covered by a single license and hosted on the client’s local server. This is the most expensive category, as they require complex setups and even hardware installation in some instances.
Software-as-a-service (SaaS) Inventory Management Systems
These solutions have a monthly subscription and are hosted on the vendor’s server. The user isn’t responsible for any installation, updates, or maintenance.
Cloud-Hosted Inventory Management Systems
Cloud-based solutions are quickly gaining popularity because of their high level of affordability and universal access. Also due to these reasons, this system category offers free basic plans. Additionally, the user doesn’t need to update the software or perform any maintenance.
You’ll also find software solutions that have a hybrid deployment. In this case, you’ll have the option to choose between being an on-premise client or use a cloud-based interface.
#1 Cin7 – Best for Enterprise Resource Planning

Cin7 can do more than inventory management–it’s a comprehensive cloud-based software that can integrate with other modules, including point-of-sale software, an e-commerce platform, and a warehouse management tool.
We feel this solution is best for enterprise resource planning (ERP) platforms because it features built-in modules for every aspect of your business that are a part of its subscription plans. It has a fully integrated point-of-sale (POS) system, along with plenty of B2B e-commerce features, manufacturing features, and a payment portal.
You also get inventory tracking, barcode scanning, and order fulfillment benefits that are standard with most inventory solutions.
Cin7 can integrate with more than 100 third-party applications, allowing you to run your business from a single platform, which is impressive. You can manage inventories across multiple markets and efficiently sell and distribute your products with minimal effort while your system remains up to date, thanks to its advanced demand forecasting and cross-channel syncing support.
Key Features
- Inventory management
- POS software support
- Order management
- Manufacturing and warehousing tools
- Branch transfers
Pricing
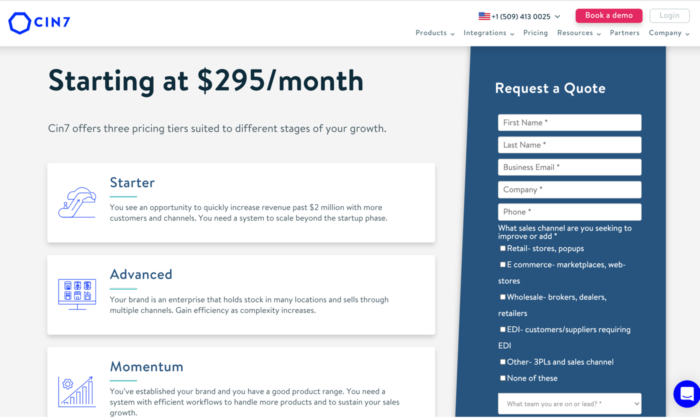
Cin7 offers three pricing tiers based on your business size:
- Starter
- Advanced
- Momentum
Prices start at $295 per month. You’ll have to contact the company for a more accurate quote for your business, though.
#2 QuickBooks Commerce – Best for Wholesale Business

This product’s name doesn’t ring a bell? We don’t blame you.
You may know QuickBooks Commerce by its former name, TradeGecko, and while the name might have changed, the software still offers everything you need for your wholesale business.
It allows you to easily monitor products as you sell, manufacture, and restock goods across all of your warehouses, sales channels, and locations. Plus, you can also set up a B2B e-commerce site, allowing all your clients to pay the agreed price.
Additionally, there’s a built-in payment processor that enables you to add a ‘Pay Now’ button in your invoices, making it easier for your clients to make a payment as soon as they receive an invoice.
QuickBooks Commerce can simplify your supply chain and order management. Not only does it have a mobile app to help you sell on the go, but its barcode scanning feature also makes it easier to update items or modify sales orders.
The software automates several repetitive ordering processes as well. This includes custom workflow creation for all types of orders, sending trigger emails, Slack notifications, and so on.
Key Features
- Inventory optimization
- Multi-channel management
- Reorder management
- Warehouse management
- Reporting/analytics
- Product identification
- Mobile access
Pricing

QuickBook Commerce has three plans payable monthly:
- Essentials: $40
- Plus: $21
- Advanced: $45
Disclaimer: The above screenshot was taken when the website was offering a 70% discount for the first three months of purchase. It may not be applicable at a later date.
#3 Upserve – Best for Restaurants
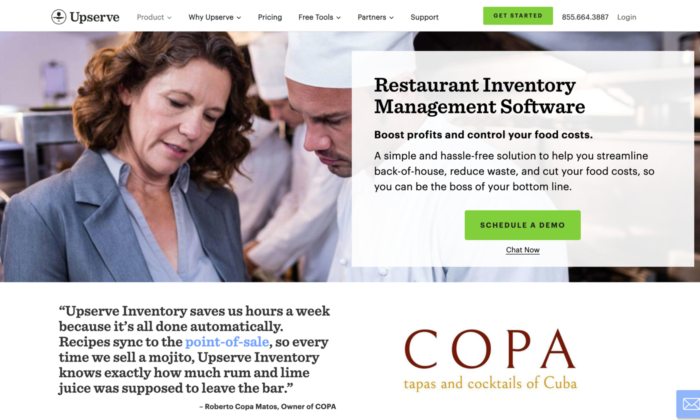
Restaurants have unique inventory needs, which is why they need more than a simple order management system–a challenge Upserve meets.
Upserve is a dynamic inventory management solution enabling users to track expiration dates and focus on specialty supply chain needs. It has been specially designed to fulfill the needs of a restaurant.
For instance, you can create recipes for the dishes on your menu and customize each recipe with an accurate reading of the ingredients (and the amounts) used on the software. Once a customer places an order for that dish, Upserve will automatically deduct those quantities from the inventory levels for the ingredients used.
This feature also helps you decide the right prices for your menu items and identify where there may be excessive food waste.
Upserve has a built-in POS system, but you can only use their unique proprietary POS hardware to run it. Nevertheless, this isn’t a deal-breaker when you consider its inventory management properties, especially for restaurants.
Key Features
- Real-time inventory tracking
- Recipe costing
- Multiple-location support
- Vendor management
- One-click ordering
- In-app barcode scanner
Pricing

Upserve offers three subscription plans to its users:
- Core: $59
- Pro: $199
- Pro Plus: $395
You also have the option to request a demo of the software.
#4 Zoho Inventory – Best for Multi-Channel Retailers

If you need advanced inventory management software for expanding business over multiple channels, Zoho Inventory is one of the best you can get.
It can streamline business operations, allow users to effectively manage inventory, purchase orders, sales orders, and shipments. It’s a GST-ready tool that saves your business GSTIN and auto-populates itself whenever there’s a purchase, sale, bill, or invoice.
The platform also offers integration with digital marketing sites like eBay, Amazon, Shopify, and Etsy. As a result, your sales team can manage online and off-line orders quickly and seamlessly.
What’s more, the tool comes equipped with an end-to-end tracking system that allows you to track the movement of every item from your warehouse to the sales point. Receiving real-time shipping rates and in-transit details is another advantage.
You can think of Zoho Inventory as an AI-powered system with several powerful features that can be customized to suit your business needs.
Key Features
- Inventory optimization
- Multi-channel management
- Reorder management
- Product identification
- Reporting/Analytics
- Mobile access
- Retail inventory management
Pricing

Zoho Inventory has different plans to suit the needs of diverse multi-channel businesses. Currently, you can choose from four options payable per organization, per month:
- Free Plan: $0
- Basic: $39
- Standard: $79
- Professional: $199
The above are annual rates. If you choose to pay monthly, the prices will increase slightly.
#5 Ordoro – Best for eCommerce Websites
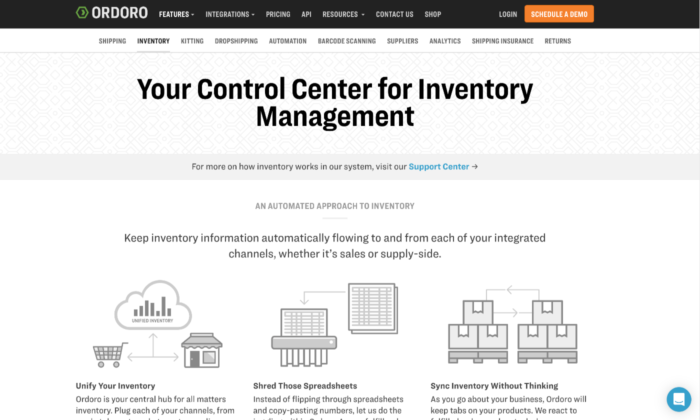
Ordoro is an all-in-one solution for inventory management and shipping for your e-commerce business.
You can integrate all of your online sales channels, assign barcodes to SKUs, manage purchase orders, and automatically update quantities on fulfillment of orders through the software. It’s designed to handle inventory updates for returned merchandise authorization (RMAs) as well.
It’s an excellent choice for sites that require vendor management features, thanks to its dropshipping capabilities.
Ordoro allows you to manage–both manually and automatically–all dropship requests to vendors without your involvement. It has a vendor portal that enables suppliers to fulfill orders directly within the platform.
Implementing a non-traditional inventory management strategy is also possible with this software. There’s an option to strategically oversell your goods or limit the number of in-stock items visible to your customers to create an illusion of scarcity, encouraging people to place their orders sooner.
Key Features
- Barcode scanning feature
- Built-in advanced analytics
- Automatic inventory syncing
- Multi-channel support
- Inventory alerts/notifications
- Kitting
Pricing

Ordoro has three feature-rich plants, including :
- Express: Starting at $59 per month
- Pro: Starting at $499 per month
- Enterprise: Request a quote
You have the option to schedule a free demo from the company as well.
Conclusion
Choosing the best inventory management solution for your business shouldn’t be taken lightly. Along with the pricing, feature availability, and benefits, you must also consider the people who will be using the software and their needs.
Luckily, inventory management software is available in all different shapes and offer different functionalities to make it suitable for various businesses and industry niches. Just don’t forget to use our guide and recommendations to find inventory management software that works best for your business.
The post Best Inventory Management Software appeared first on Neil Patel.
source https://neilpatel.com/blog/best-inventory-management-software/
7 Strategies for Getting More Customer Testimonials (And What to Do With Them)

Every great site has a powerful customer testimonial page.
It’s formed by compelling quotes from current customers that make a product or service seem like such an obviously good idea, anyone would sign up.
Great testimonials tell people that your business is not only legitimate but that it actually works.
And testimonials are powerful.
In fact, 92% of customers report they read online reviews before making a purchase decision.
Testimonials boost your conversion rate and inspire trust in your business. But if you don’t have a testimonial page yet, how can you start?
The answer is simple—either feature existing reviews, or kindly ask existing customers to create new reviews for you.
Today, I’ll share some of the top sites you can use to collect customer reviews and how to encourage customers to get more testimonials.
1. Checkout Your Facebook Reviews
The first place you need to look at are sites where people have already given you reviews.
The easiest place? Your current Facebook business page. Especially if you’re a local business, you might already have reviews here that you haven’t noticed.
Facebook testimonials can be quite detailed, making them an ideal way to highlight what your business does best.
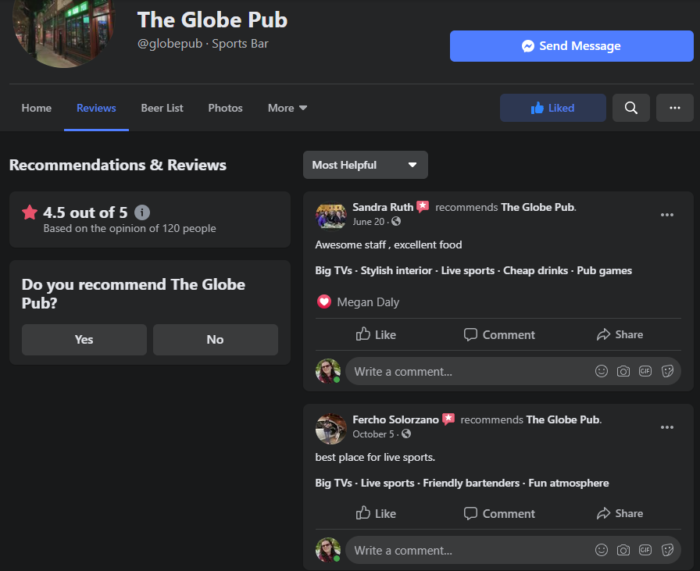
If you don’t have reviews on your Facebook page, it’s a cinch to ask people to add a comment. We’ll cover more strategies on how to do this in point six.
2. Look at LinkedIn Recommendations
If you’re a freelancer or are building out the testimonial section for a “work with me” page, LinkedIn is a gold mine of great recommendations and glowing reviews.
All you need to do is ask people to offer a recommendation to you, or use your existing recommendations—in whole or just snippets—as promotion for your services.
Of course, you can’t get reviews on your company profile, since recommendations are only available for individuals.
But if you own a company with many employees, why not encourage all of them to be active on LinkedIn?
This might lead to individual employees receiving recommendations from customers they work with on behalf of your company.
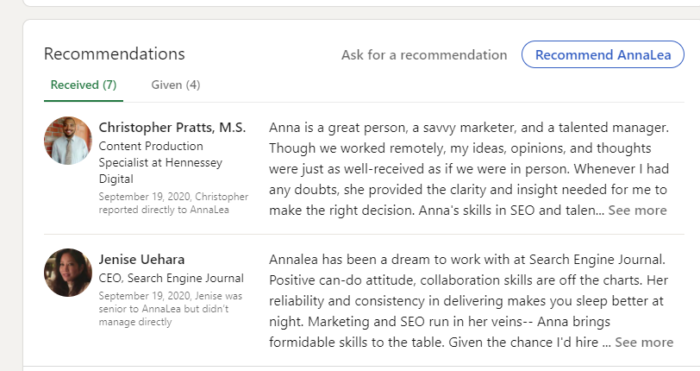
With their permission, you can use these recommendations on your website, either on a testimonials page or a page dedicated to your employees’ bios.
Plus, it wouldn’t hurt for someone who is researching your company on LinkedIn to see your employees have glowing recommendations.
3. Ask for YouTube Video Reviews
What’s stronger than a text-based review? A video of your customer talking about how your products or services have helped them.
Encourage your fans to add videos to their own YouTube account. Let them tell stories about their success and mention your brand, or even encourage video reviews of your product.
If they send you the link, you can add these videos to your channel as favorites and create a playlist of customer reviews. You can also write transcriptions and include them as testimonials.
You can also film reviews on the fly with customers at your store, visitors to your office, or fellow attendees at conferences. Just keep a smartphone with high video resolution handy.
If you have a strong YouTube channel to begin with, people will be happy to be featured on it in exchange for their thoughts.
Because of the closeness of the medium and the sharing potential, videos are one of the best ways to get feedback from your customers.
4. Search Local Search Directories
If you have a local business, then you probably already understand the importance of local search directories.
Sites like Google Business Profiles, Yahoo Local Business, Yelp, and Merchant Circle allow members of their networks to write reviews about local businesses.
Here’s an example of testimonials on Google Business profiles:
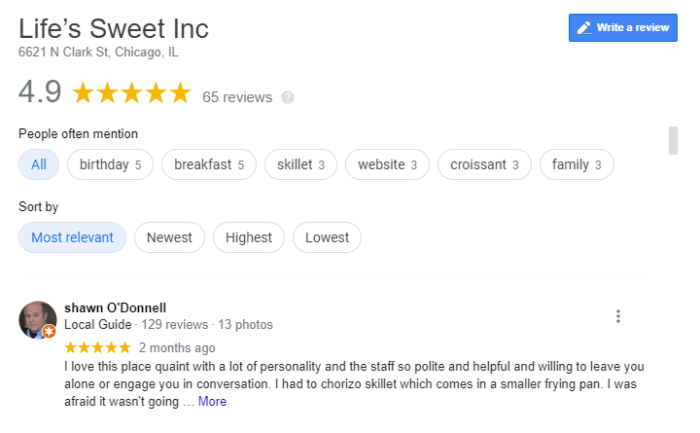
If you have great reviews on these sites, you should share them on your testimonials page as well. This can be done by copying and pasting, taking screenshots of reviews, or using a WordPress plugin to show Google reviews on your website.
If you don’t have reviews there yet, this is a great way to recommend people leave you a review. Not only will you get to include it on your site, but it’ll also be available in searches.
Today people rely more and more on Google’s ratings to decide which merchants to visit. By getting as many reviews as possible, you can keep your business high in the search results.
If you’re just starting, set up a basic account on those sites and start encouraging customers to review you there.
5. Don’t Forget About Niche Review Sites
Depending on your business’ industry, you may want to focus on getting reviews on niche review sites that your target audience frequents.
While sites like Google, Yahoo, and Yelp apply to all kinds of local businesses, there might be others that cater to your specific industry.
Hotels, for example, would want great reviews on sites such as Expedia, Travelocity, and TripAdvisor. Landscapers and painters might refer to Thumbtack, and so on. Our agency has reviews on Trust Pilot.
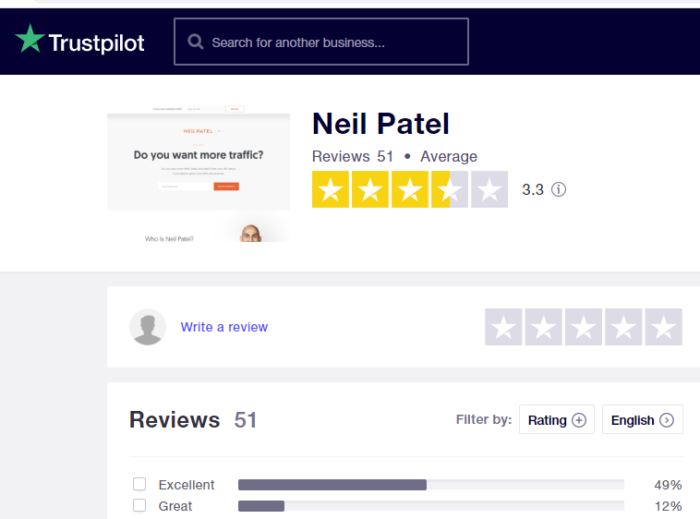
Since many people get their first impression of your services from these sites, it’s a good idea to focus on building a quality reputation there, then copying the reviews to your site.
6. Reward Customers Who Review
Considering all the benefits of getting customers to provide great reviews for your site, how can you encourage them to start posting their thoughts?
If possible, offer a clear incentive for posting a review. For example, fast food restaurants often offer customers a chance to win a cash prize by filling out an online survey.
You can apply the same concept to encourage online reviews. A few examples include offering coupons, special deals, or even a discount on the next purchase with proof of a review.
Just make sure to review the terms and conditions of the site you want to offer incentives on. Some, like Yelp and Google, ban offering direct incentives. However, you can usually add a line to your receipt or a sign in your store asking customers to leave a review.
If you do decide to reward customers who review, it’s a good idea to disclose that in the testimonial.
7. Setup Google Alerts and Social Mentions
Last, but not least, there are likely a ton of unsolicited customer reviews written about your company on other sites, such as personal blogs and forums.
These can be great opportunities to link to from your website because they are clearly unbiased reviews.
When they’re published on another site, people can say whatever they want and you don’t have control over what they’ve decided to write about you.
How do you find these third-party reviews? Simple.
Set up daily email notifications through Google Alerts and Social Mention. Choose a few terms like your personal name, business name, brand, and specific products.
You can also include a few keywords if applicable. And it’s a good idea to include the word “review” for anything so broad it’ll track articles not specifically about your company.
Once you get these reviews, you can ask the people who have mentioned your brand if you can feature their comments or story on your testimonials page.
Usually, people are happy to oblige, especially in exchange for a link from your site.
How to Create Your Testimonials Page
Now that you’ve collected your reviews, it’s time to place them all on one easy-to-access page.
According to a recent study, 91% of 18- to 34-year-olds trust online reviews as much as personal recommendations, so it’s important to make this as easy to find as possible.
The goal of the testimonial page is to make it easy for visitors to see your most glowing testimonials all at once, instead of needing to search the Internet to see the positive things people are saying.
Make sure to credit the original site of the review. If it came from Yelp, LinkedIn, or another site it’s polite to link back to the original source.
The added benefit of linking is that you might encourage more people to leave reviews once they’ve seen what everyone else has to say.
And if necessary, you should always ask permission before posting third-party reviews to your website.
But once you get that permission, don’t hesitate to promote your review page! You worked hard to create a great product or service others are excited about.
You earned it; don’t be afraid to share.
Conclusion
If you want to add a layer of credibility to your site, you need to build out a solid testimonial page. Testimonials build up the social proof that increases sales and conversions.
The quickest and easiest way to do this is by finding existing reviews from around the web and compiling them onto one page of your site.
You can check out social networks like Facebook and LinkedIn, as well as specific sites like maps locations, search directories, and niche review sites.
To take things to the next level, ask existing customers to leave customer testimonials for your business.
One of the most powerful formats is through YouTube videos, since it’s a more intimate medium where you can see and hear the person describing the details of the product.
If you’re still struggling to get reviews, you can consider offering a reward to customers who provide you with a review — just make sure its allowed if you ask them to leave testimonials on sites like Yelp or Google.
Finally, keep your eyes peeled by checking on any media mentions that might be floating around online.
How will you encourage customers to leave testimonials?
The post 7 Strategies for Getting More Customer Testimonials (And What to Do With Them) appeared first on Neil Patel.
The Advanced Guide to Facebook Watch

In 2017, Facebook launched its answer to the burgeoning streaming video market: Facebook Watch. Through Watch, users could view both scripted and live video from professional networks, brands, influencers, and everyday people.
Facebook released Watch to a limited group of users, and for that first year, it flew pretty much under the radar. In 2018, they launched it globally, and the service took off like a rocket.
By 2019, Watch had 270 million monthly users, and by 2020, that number had shot up to over 1.25 billion, according to Facebook.
I covered Facebook Watch in a previous post when it initially launched. Since then, they have expanded their content offerings (even getting into the music space!) and added a ton of features for brands and marketers.
In this post, I’ll dive deep into how to use Facebook Watch for marketing, now that the platform has matured.
Content on Facebook Watch
Facebook is still experimenting with different content types by adding, subtracting, and tweaking to find the right balance for their platform. In 2019, Facebook’s head of global creative strategy Rick Van Veen told Variety,
We’re still figuring it out and learning. When you start a new platform, you’re going to have to throw a bunch of stuff at the wall and see what works and what doesn’t.
Scripted Content
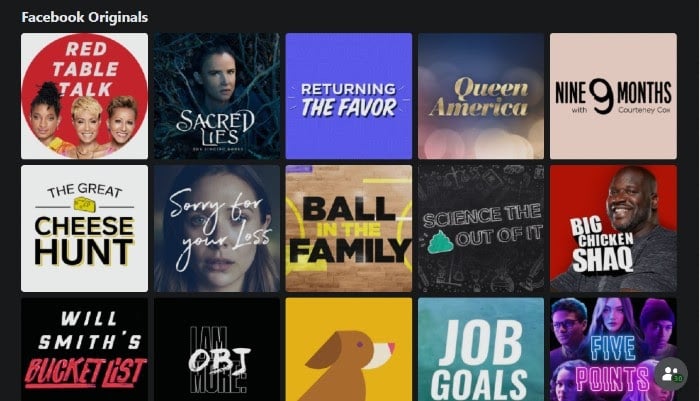
Facebook’s scripted content can be found under the Show tab. This section is where they’ve entered the ring with the likes of Netflix, Apple+, and Hulu. Here, users can find everything from comedies to critically acclaimed dramas to reality and talk shows.
“Red Table Talk,” for example, is a popular show starring Jada Pinkett Smith, where she brings on guests to discuss sensitive topics such as divorce and gender identity. Meanwhile, Mike Rowe of “Dirty Jobs” fame stars in “Return the Favor,” which won a Daytime Emmy.

However, they’ve recently scaled back on their scripted content, canceling some of their popular shows in favor of live and sourced content from brands and users.
Live Content
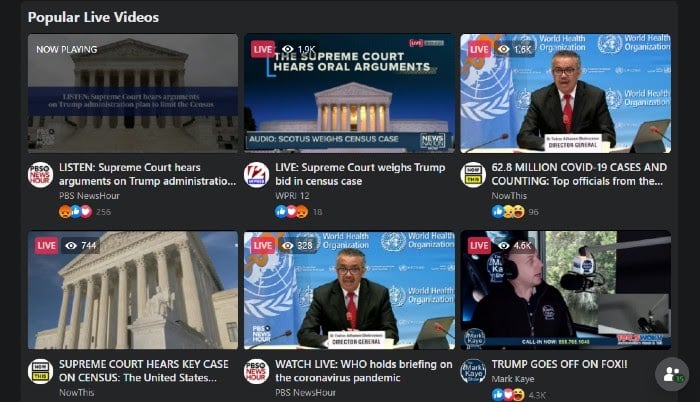
Facebook Live predates Watch by a year. When Watch launched, however, Live was bundled in with the rest of the video content.
Types of videos on Live range from U.S. Senate committee hearings to live author readings and skiers showing off their tricks.
Small businesses have also rushed to Live, creating events and classes to increase revenue.
Music Videos
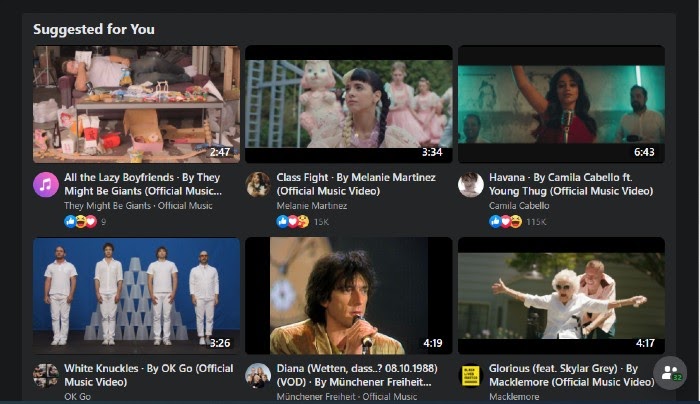
In August 2020, Facebook launched its new music discovery platform, Facebook Music. Here, users can explore videos by genre, trending topics, artist, and even mood. Currently, the app is only available in the U.S., India, and Thailand, but it’s already garnered a lot of attention.
For instance, Katy Perry debuted her music video “Smile,” the title track of her fifth album, on Facebook Watch.
How Facebook Watch Works
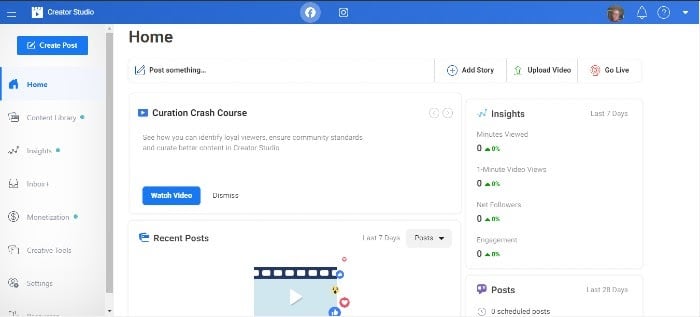
When you create a video on Facebook Watch, whether it’s a live event or a scripted show, you upload it to Facebook using their Creator Studio.
The Creator Studio is the hub for all of your business content for Facebook. From here, you can bulk upload videos, crosspost to different pages, schedule posts, consolidate engagement, and monetize. You can also use their in-depth analytics tools to monitor your content.
On the videos you upload, Facebook places mid-roll ads. Forty-five percent of the revenue from those ads goes to Facebook, while the remaining 55 percent goes to you.
Helpful Hint: Facebook prioritizes longer videos (3+ minutes) and content that engages the audience and sparks conversation. They’re looking for content creators who respond to user comments and pin the best comments to the top of the feed.
How Your Business Can Benefit from Using Advanced Facebook Watch Features
In France, according to Facebook, national broadcaster M6 began creating videos for Watch. Their one-minute video views more than doubled in nine months and they acquired 6 million new follows organically.
Here in the U.S., says Facebook, Buzzfeed has increased their revenue by creating videos over three minutes across their Tasty, Goodful, Nifty, BringMe, Cocoa Butter, and Pero Like pages.
“We moved quickly and increased our payout from total in-stream ads by 20% compared to the previous half,” Maycie Timpone, Executive Director, Video & Publishing at BuzzFeed, told Facebook.
Facebook Watch has become a powerful tool in marketers’ pockets. Let’s take a look at a few ways Watch helps you increase revenue and attract new followers.
Hyper-Personalized Content
Facebook is all about personalized content, and Facebook Watch lets you upload videos right to your target audience. Your videos will also appear in specific categories, such as “Shows Friends Are Following.”
Facebook will also categorize your videos by genre, topic, and even mood.
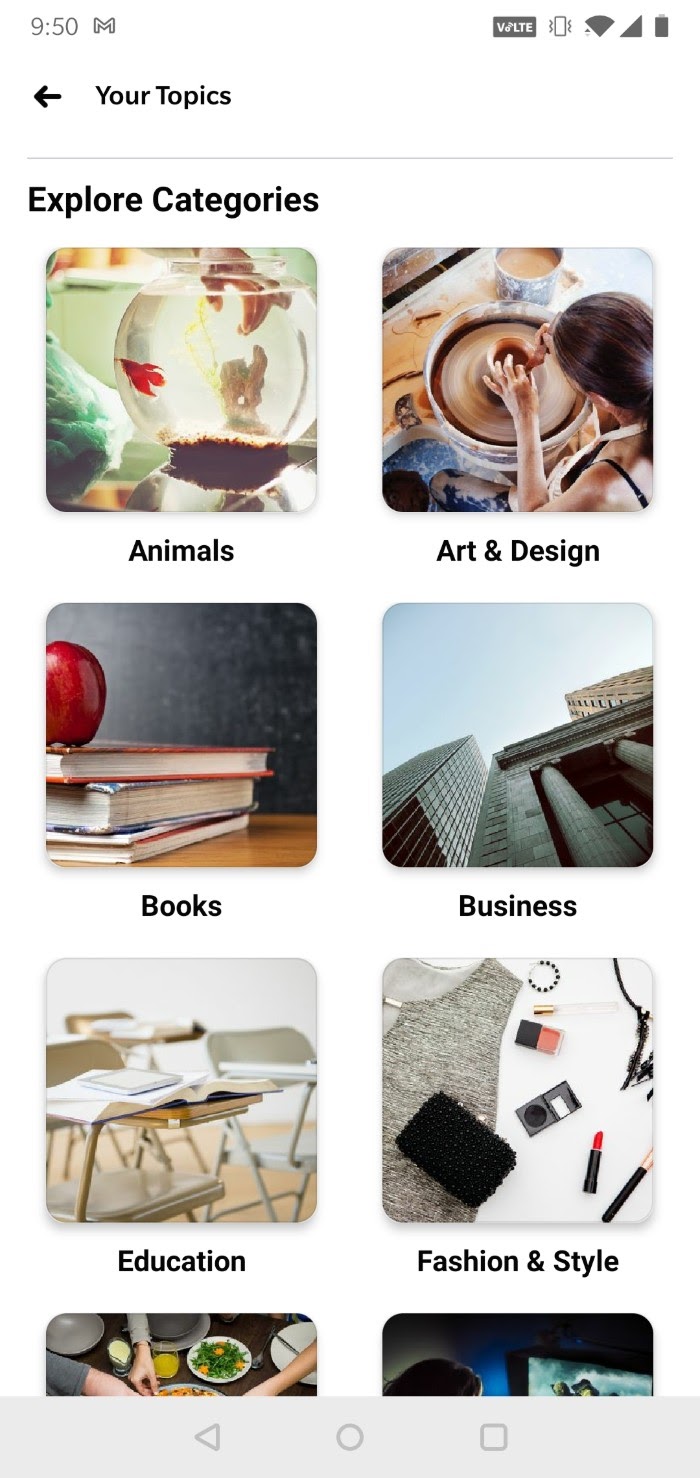
Recently, Facebook introduced Topics to mobile users. Topics allows users to further customize their video feed by choosing categories that interest them.
Show Pages
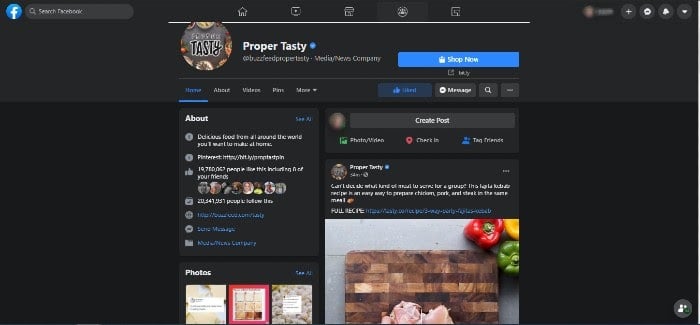
Show pages allow users to interact with show creators and fans. They can leave comments, ask questions, or even engage in interactive video content. Just like any other Facebook page, they can like, follow, and share pages with friends.
Real-Time Engagement
This feature is particularly helpful with live video. Viewers can react to, share, and comment on a video in real-time.
Real-time engagement is a great opportunity to get initial feedback on your video and engage with your audience by asking and answering questions and becoming part of the conversation.
Facebook Watch Parties
Facebook’s number one goal is to bring people together. It’s why they added groups a few years back, to allow people with similar interests to find each other.
With Facebook Watch Parties, viewers can bring a group of friends together to watch videos and chat about them in real-time.
Video creators can make content tailored to watch parties to boost engagement.
Playlists
Playlists allow video creators to group videos and post them to their pages. Videos play consecutively to boost views.
Marketers can use playlists for video series or to group videos by topic.
Optimizing Your Facebook Watch Videos
You may be creating killer content for YouTube already, but optimizing Facebook Watch videos is a little different. Here are some tips for getting the most out of your Facebook video content:
First, Make Sure It’s Original
Pulling content over from YouTube or even your website won’t work for many reasons. First, the aspect ratio may be wrong (more on that next). Second, original content exclusive to Facebook will keep people coming back, allowing you to take advantage of Facebook’s monetization tools.
Pay Attention to Aspect Ratio
Facebook gives video creators specific aspect ratios for all pages on both Facebook and Instagram.
You’ll want to follow those guidelines, but in general, make sure your video is shot for mobile. The vast majority of Facebook users access it via mobile, and more than half of ad revenue comes from mobile-first video ads.
Add Captions
Eighty-five percent of videos on Facebook are watched without sound. So, adding captions to all of your video content will naturally boost engagement.
Include a CTA
When you upload a video, Facebook allows you to add a CTA at the end. Whether it’s an invitation to watch more videos, check out a product, or simply like your page, adding a CTA can increase engagement and even boost conversions.
Beyond the Basics: Advanced Uses and Features of Facebook Watch
Recently, Facebook has added a bunch of cool new features that marketers can take advantage of. Let’s take a look at them.
ThruPlay
ThruPlay is a default setting and one you should keep on. With ThruPlay, if your video is shorter than 15 seconds, it will post it to users who are more likely to watch the whole thing. If it’s longer than that, it will deliver it to users who generally watch videos longer than 15 seconds all the way through.
Paid Online Events
Paid online events are a function of live video and have become an essential tool for businesses. Brands can create, host, and promote an event all in one place. They can also set a price and collect payment easily.
Helpful Hint: Facebook normally collects a fee for a paid online event. At least until August 2021, however, they have waived their fees.
Fan Subscriptions
Creating the ability for fans to subscribe to your video page boosts engagement. It also allows you to foster customer loyalty through exclusive offers and content for subscribers.
According to Facebook, it also allows you to predict revenue monthly.
Stars
Another feature is Stars, a tool that allows fans to support your work. Users can purchase stars to send to you. For every star a fan sends to you, Facebook gives you 1 cent.
(Think “Ralph Breaks the Internet” and the hearts he had to earn on his videos.)
The more you engage with users, the more likely they are to send you stars.
Facebook is still rolling out this program to a limited number of users, but you can sign up to show your interest.
A/B Testing Tools
On the back end, Organic Video Post Testing allows video creators to test between two and four variations of a video at a time. Videos are distributed to your target audience, but they’re not posted to your page. The video with the most engagement after a period of time is then posted to your page automatically.
In-Stream Ads
According to Variety, Facebook takes in 22 percent of U.S. digital ad spend. Before Watch, ads that appeared in newsfeeds and the right rail kind of got lost in the mix, right?
However, as pointed out previously, ads that would usually get lost in Facebook feeds get a lot more attention when they appear in the middle of a video.
Mining Audience Data from Your Facebook Watch Viewers
When it comes to analytics, Facebook Creator Studio is a veritable treasure trove. Here are some of the cooler stats you can mine from your dashboard:
Views
There are so many different ways you can parse these metrics. For example, if you want to see the number of minutes viewed, you don’t have to settle for a lump sum. You can break it down by minutes viewed on your page, in shared posts, and crossposts.
You can also see how many views were over three seconds long or how many people viewed the whole video, depending on what comes first.
You can also filter by auto-played vs. click-played and paid vs. organic.
All of the views are measured over a 28-day period.
Audience Engagement and Retention
To get a quick overview of your posts, you can look at the number of reactions, comments, and shares for videos with at least 100 views.
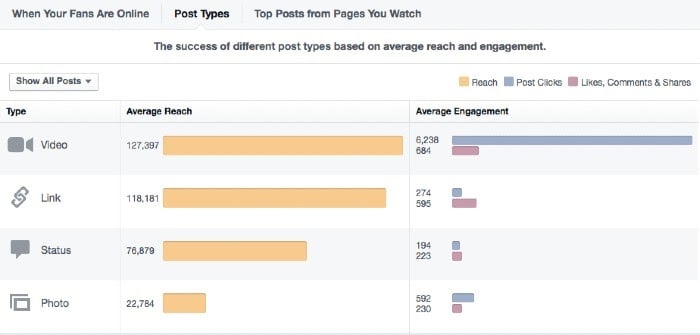
You can also go way beyond that. You can see audience demographics, and you can filter by fans and non-fans to know who you’re truly reaching.
If a video is performing well, you can choose to boost it right from your dashboard.
To dig even deeper into each video, Facebook shows your viewer retention through the entire length of the video. Line graphs like this one show you exactly where viewers dropped off in your video so you can make adjustments.
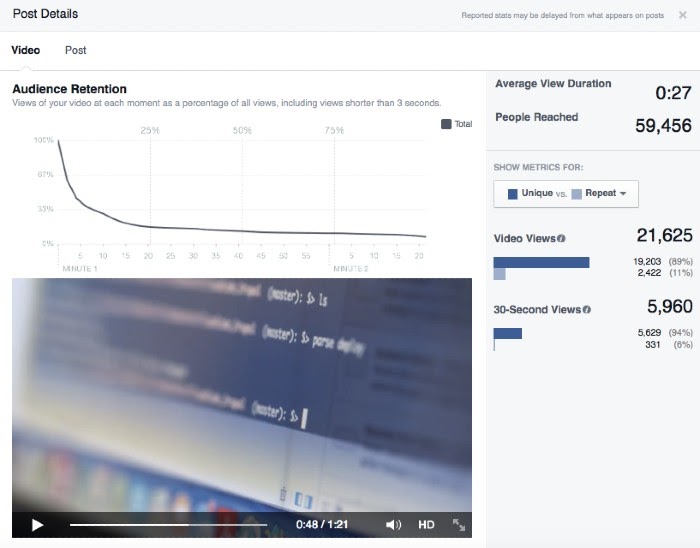
What’s really neat: when you hover over the line graph, each point of the line displays your video’s corresponding frame.
Finally, you can measure each post against other posts to assess which types of videos and content are working well (or not) for you.
Negative Feedback
Just as important as the positive metrics are the negative ones. Facebook can show you negative comments, as well as how many times people hid your video from their feed or reported it as inappropriate.
Click-Throughs
Finally, Facebook can differentiate between clicks to play your video, clicks on links embedded in your video description, and clicks on your CTA.
Increasing User Engagement Via Facebook Watch (and Why This Matters!)
We’ve talked about all the levers you can pull with Facebook Watch, but how do you use them to increase user engagement? Here’s how to use all their cool features to do just that:
Take Advantage of Real-Time Commenting
Comments give context to all those reactions and shares, but you probably knew that. Of course, you can use them to improve your content by creating more of what gets positive comments and less of what doesn’t.
More importantly, you should be responding to comments, not only on your videos but also on your pages. Show your fans that you’re paying attention, and they will be engaged followers.
Spark Conversations
Instead of simply reacting to conversations already happening, create and direct the discourse yourself. Invite fans to comment on specific elements of your videos, share their tips, or ask questions.
If you’re a part of the Star program, this is a great way to encourage people to send some your way.
Use the Subscription Function
Subscriptions are a great way to create that velvet rope effect. Create an exclusive space for fans to get updates on content before anyone else. Offer content and giveaways for subscribers.
Make them feel special, and they’ll keep coming back for more.
Put That Mined Data to Good Use
As you’ve seen, Facebook gives you a wealth of analytics about your videos, right down to the minute viewers stopped watching your videos.
Use that information to compare and tweak content, experiment with longer or shorter videos, or introduce and keep track of new content.
Don’t Neglect the A/B Testing Functionality
While it is time-consuming to create more than one video, A/B testing multiple versions of videos will only increase your engagement, and you can’t deny how easy Facebook makes it.
Since they don’t post anything to your page until the end of the testing period (which they do automatically), you really have nothing to lose.
Conclusion
Facebook Watch has had explosive growth and attracted the attention of brands, celebrities, small businesses, and influencers. The sheer number of viewers and the amount of ad revenue on the table makes creating original content for Facebook a no-brainer.
The real trick is pulling the right levers to create engaging videos that get reactions, shares, and comments. If you can get subscriptions, even better.
Dive into your Creative Studio to look at all the advanced tools Facebook offers.
How will you use Facebook Watch to build your audience and boost your revenue?
The post The Advanced Guide to Facebook Watch appeared first on Neil Patel.
Stock Photos are Dead: Create These Blog Images Instead

The use of images in your blog posts is a no-brainer.
Images are an easy way to break up chunks of text, add context, or give your readers a more accessible medium through which to digest your content.
With the growth of written content online, it’s harder to have your content be unique from others. Writers need to adapt to the changing landscape.
How can you continue to engage your audience when so many bloggers have written on the same topics—and will continue to do so?
The answer is original imagery.
Blog Image Trends: Why Stock Photos Are Dead
With more content available on the web every day, it’s more important than ever to stand out.
While finding ways to put a unique spin on your blog post topics is critical, there are only so many angles on one subject. You need other types of content, such as photographs and illustrations, to make your mark.
Unfortunately, stock photos just don’t cut it anymore when you have the resources and time to make an impact.

This reason is in part because blog images don’t only live on your blog. They make the rounds on Twitter, Facebook, and Pinterest whenever your posts are shared. Chances are, your users have seen similar stock photos many times already, and they’re bored with them.
With so many articles to read, videos to watch, and social media news to ingest, the average reader won’t spend hours looking for the best article on your topic. They’ll choose the most visually appealing option nearly every time.
This is backed by visual content statistics, such as those collected by Venngage. When surveying marketers on content that helped them reach their marketing goals, original images performed best 40% of the time compared to stock photos at 13%.
So before you use stock photography in your next blog post, ask yourself:
Will my readers interact with the same stale image they’ve seen numerous times when researching this topic? Or will they choose to interact with an original image that more perfectly captures the content?
Top Reasons You Should Use Interactive and Original Images on Your Blog
Your goal as a digital marketer is to increase conversions.
So how do you do this even better than you already are, given the changing online landscape?
There are plenty of ways to drive traffic to your website. But what’s more important is driving the right traffic—the users who will engage with your content.
Images can help. According to BlogTyrant, images can up conversions by over 300%.

But keep in mind the kinds of images you use can have an impact on your conversions, too.
For years, stock imagery was the norm. But, it’s time to move away from those pictures.
Why? According to a study done by Marketing Experiments, readers are 35% more likely to convert when presented with a non-stock photo.
Original images offer authenticity stock ones can’t provide. They offer your readers a peek behind the curtain, allowing them to see a deeper side of your content.
Unique blog image content can offer other benefits, including increased customer trust and brand recognition.
According to Brain Rules, a slogan alone only sticks in the minds of 10% of people. When related imagery is added, though, retention rises to 65%. That’s an increase you can’t ignore if increasing brand recognition is on your radar.
Original image content has an often-overlooked SEO benefit, too, and that’s the improvement of Google’s E-A-T score. The E-A-T score lets Google assess content quality based on these three standards:
- Expertise
- Authoritativeness
- Trustworthiness

How can original imagery improve your E-A-T rating?
Whether you shoot and edit photography on your own or you work with a digital illustrator, your unique imagery will have a personal spin. If done right, this will become a vital part of your personal brand strategy.
You show expertise by including images that clearly demonstrate you understand your content.
You show authoritativeness by having consistent, unique branding people recognize immediately.
You show trustworthiness by providing information through images that are accurate and increase user’s knowledge.
A strong personal brand will bump all three elements of an E-A-T rating.
Placing Images on Your Blog
Images, just like text, can also be perceived as “fluff.” Because of this, you need to know when to use pictures on your blog to optimize user experience and benefit your SEO.
You should use images to do three very specific things.
Break Up Large Chunks of Text
According to a study by Microsoft, the average attention span of heavy screen users is a mere eight seconds.
That means you have eight seconds to captivate your audience—and large blocks of text may make them click away pretty quickly.
However, you don’t have to write two sentence posts to make them take fewer than eight seconds to read. Instead, employ clever tactics to keep your readers engaged.

One tactic is to introduce other media, such as photos or digital illustrations. This creates a less intimidating reading experience while also making the post more visually appealing.
Explain a Concept
Some concepts are too abstract or complex to explain effectively in writing, especially if your audience isn’t strictly experts in your topic.
Custom diagrams and visuals can help readers understand the material.
Enliven the Content
As much as you like to think your content is witty and engaging, some topics just won’t interest readers for very long. You can use original visuals to add some life to otherwise “dull” content in these cases.
When Should You Use Custom Illustrations or Photos?
The cost of custom graphics may be prohibitive for some bloggers, but it is possible to find some middle ground.
Use custom illustrations and photography sparingly. Ask yourself where they make the most sense and insert them accordingly.
If you’re creating a landing page for a new product or service, for example, this would be the place to splurge. After all, you want this content to stand out from your competitors—what better way than with a custom graphic?
You can also utilize custom illustrations to drive a point home or explain data.
Whether a comic strip panel, a diagram, or a flow chart, you can use custom illustrations to share ideas with your readers in a way words simply can’t.
When Should You Create Interactive Graphics?
You can take your blog’s imagery one step further with interactive graphics.
Interactive graphics are custom graphics that support reader interactions like mouse pointer movement, clicks, or keyboard input.
This form of original imagery is commonly used in infographics, though other display types include side-by-side comparisons, flow charts, and graphs.
The most obvious use for interactive graphics is to catch the reader’s eye.
Perhaps more importantly, they can also be used to break complex information down into bite-sized chunks. For example, take a look at this nifty interactive graphic that shows users how Google search works without becoming overwhelmed.
Examples of Successful Blog Images
There are plenty of ways to use images on your blog.
Here’s one creative example from Oberlo:
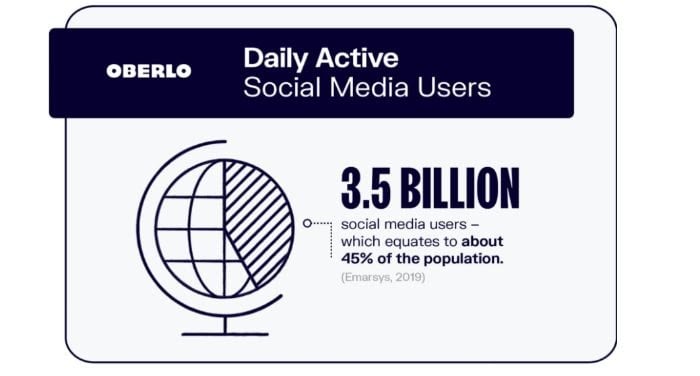
Instead of one lengthy infographic, the content creators chose individual infographic “slides” to answer each question on their post about social media statistics.
This use of graphics achieves two things:
- It makes the information easy to digest.
- It makes it simple for readers to share information on social media.
As mentioned above, one of the benefits of original blog imagery is the personal branding aspect. When you use a particular style consistently, it becomes synonymous with your brand.
Copyblogger provides an excellent example of this:

Their featured images consistently use quotes overlaid on eye-catching images. They work as a watermark of sorts, as anyone who sees their imagery elsewhere will be able to identify them as belonging to Copyblogger immediately.
And what about interactive content? Your options are only limited by your imagination.
Take a look at this comprehensive timeline of the Marvel Cinematic Universe:

As you scroll through the timeline, new images and text content can be seen. This example tells a complex story in a linear, non-intimidating format.
What to Use Instead of Stock Photos
You know you should be using unique imagery on your blog. But what should you use instead of stock photos?
There are plenty of options for every budget and skill level.
Take Your Own Photos
You don’t need a professional setup to take photographs for your blog. Even a smartphone camera can be used to take your own photos.
Depending on the amount of time you have and your budget, you can edit these photos on your phone or by using software like Photoshop.
Edit Stock Photos
Not all stock photos are bad, but you must be purposeful in the ones you choose.
It’s best to choose stock images that haven’t been used too often. How can you know. Using Google’s reverse image search, you can search images to see how many results they get. The less, the better.
Even more than that, though, you can make tweaks to existing stock photos to give them a new look.
Some quick edits include:
- Flipping the image horizontally
- Adding a text overlay
- Adding an image effect or filter
- Cropping the image (from rectangle to square, for example)
The easiest edits can be done using free or low-cost online tools or your computer’s in-built image editing software.
Use Online Tools and Software
Tools exist which enable you to edit or create images in any format and style. You can use these tools to edit stock photos, as mentioned above, or build imagery using digital assets.
Many tools like Lucidpress even have pre-built templates to inspire your designs.
Use Custom Images
Images are so much more than photographs, and you don’t need to rely on photography alone to add visuals to your blog.
Custom images can also include digital assets, illustrations, and iconography.
How to Get Original or Interactive Blog Images
It’s never been easier or more affordable to get original and interactive blog images.
When it comes to hiring a professional, you have options. You can easily find freelancers on sites like Fiverr or Upwork or use a service like Design Pickle.
If you know of a digital artist with a style you like, you may be able to commission them. They are often more expensive than the freelancers you’ll find on the websites mentioned above, but they’re great if you need a specific style.
For bloggers strapped for time, there are services you can hire to do the heavy lifting. The service may be a creative agency or a blog content specialist. Either way, you provide details, and they’ll commission work on your behalf.
Do you have more time than money? You can also create blog images using tools like Canva, Pixlr, or PicMonkey. For a more professional finish, you can invest in a creative suite like Adobe Creative Cloud.
How Much Do Original Blog Images Cost?
As with most services, there are options for almost every budget.
If you hire a freelancer for a one-off gig, then the price varies based on the number of images, the complexity of the work, and how you plan to use the final product.
In some cases, you may be able to get a discount when you buy in bulk.
Commissioning a professional is likely to be the most expensive option. Unless you have money to burn, this should be reserved for high-impact projects, like illustrations for sales landing pages or campaign launches.
Tools to Create Blog Images
Whether you’re on a limited budget or just want to let the creative juices flow, you can opt to create your images.
There are free and low-cost options, such as Canva and PicMonkey. These tools have limitations, including watermarks, if you don’t opt for premium memberships. You also need to be sure all assets used in your design are copyright-free.
For 100% original work, you may find creative suites like Adobe to be the best bang for your buck. With access to tools like Photoshop, InDesign, and Illustrator, you can create and edit various blog illustrations, diagrams, and original photography.
There are plenty of tutorials available online for creating graphics using Adobe Creative Cloud—so if you’re unable to pay a designer for their services, you don’t have to just guess about how to do this.
If you’re in a time crunch, there are even services that offer quick turnaround times on unique illustrative designs. With tools such as Laetro, you can have a one-of-a-kind illustration in only 24 hours.
Conclusion
There’s no need to scroll through page after page of stock photos to find the right images for your blog post. You can create original blog images, whether by yourself or with the help of a professional.
Original blog imagery, including photography and graphics, can take your blog posts to the next level. It also helps build your overall brand and take your marketing to the next level.
With plenty of options at your fingertips, from free tools like Canva to paid software like Adobe to freelance artists, there’s no reason not to use original images on your blog.
Which of the tools mentioned above are you most likely to use to create images for your blog? Or do you prefer ones we haven’t mentioned? Let us know!
The post Stock Photos are Dead: Create These Blog Images Instead appeared first on Neil Patel.
Best Time Tracking Software

Disclosure: This content is reader-supported, which means if you click on some of our links that we may earn a commission.
Why is time tracking still a source of stress for employees, supervisors, and management?
There are only two reasons, really.
They’re not using time tracking software.
Or, they’re using a solution that doesn’t fit with their business.
There is no third reason.
I can say that with total confidence because there are so many good time trackers out there to utilize.
Because no one should suffer any longer, I’m going to share the top five time tracking software options on the market today.
The Top 5 Options for Time Tracking Software
- Clockify – Best Reporting Features
- Time Doctor – Best for Employee Monitoring
- Toggl Track – Best for Holding Everyone Accountable
- TSheets – Best for GPS Monitoring
- Tick – Best for SMB Time Management
How to Choose the Best Time Tracking Software for You
If you have searched for time tracking software before, there’s one thing you’ll notice right away.
All of the popular products deliver way more than simple time tracking.
Trying to keep track of all these additional features would be difficult, but they break down into four highly-recognizable areas:
- Scheduling
- Reporting
- Accounting
- Monitoring
Does your time tracker need to be connected to some or all of these areas?
Finding the best time tracking software is all about knowing how you want it to sync with your business. Let’s dive into the core features in each area.
Scheduling
When employees clock in, time tracking software automatically logs their hours. In most cases, users fill out a timecard that says what project or client they are working for.
All of that information gets tracked in a timesheet.
In this example timesheet from Clockify, you can see how all the time entries are automatically mapped out over the week.

Some time tracking software comes with built-in scheduling tools that let you assign shifts and alert users when there’s a change in plans.
Time tracking software that’s light on native scheduling features usually has tight integration with the best project management solutions.
Look for the product that has what you need out of the box or connects with the tools you already use to manage your schedule.
Reporting
Time tracking software will let you monitor productivity and forecast budget problems well in advance.
The products I like pull all your data into clear visualizations.
In this example from Toggl Track, it’s easy to see how work is progressing and the impact that has on revenue:
Good tracking platforms also let you drill down into the specifics of each client, employee, and project.

The more advanced tools will let users and administrators add more detail, but all of the products on this list come with tools that will help you stay on budget.
Accounting
A lot of companies use time tracking software to streamline payroll and invoicing. By integrating with services like Quickbooks and PayPal, these tools can handle the job in a few clicks.
You can forget about long spreadsheets and good ol’ human error. Whenever you generate an invoice or make a payment, there’s a clear record of the work that was done.
Monitoring
Some time tracking software comes with monitoring features that let you check up on employee productivity.
These include location-based monitoring—such as GPS tracking—which ensures that employees are where they are supposed to be.
Time tracking software can also be downloaded to a specific tablet or desktop that serves as a time clock kiosk.
Like a punch card system of old, the kiosk lets employees enter a PIN or takes a picture to prove they clocked in on time.
There are also digital monitoring aspects to time tracking software, which can record the websites and applications a user visits while they are clocked in.
Some products also take screenshots at random intervals, to ensure that people are staying on task.
One quick, important word about monitoring and tracking software.
Before you deploy your new solution, have an open conversation with employees about what’s happening and why. Find alignment in the fact that tracking and monitoring will protect employees as much as the company.
The Different Types of Time Tracking Software
Time tracking software really breaks into two separate categories. One important thing to note is that both types of software have integrations for payroll and billing.
Time Clock Software
If you are looking for basic time tracking functionality, time clock software is a good place to start.
These are great products for companies that need to track remote workers, as they can clock in right from their phone.
For consultants, freelancers, or small business owners who really just need to keep track of billable hours, time clock software can be a solid, cost-effective solution.
Project Management Software
Once scheduling and reporting features are added to time tracking software, it becomes a really powerful tool for project management.
Premium subscriptions for products like Clockify are going to come with everything you need to plan, budget, and execute a project. Others, like Tick, work best when integrated with tools like Basecamp, Trello, and Asana.
Working time tracking software into your project management workflow can be a huge time-saver, and it gives decision-makers excellent insight into productivity.
#1- Clockify — Best Reporting Features
Clockify is a wonderfully simple solution for time tracking and project management. The free version is generous and its paid plans are very reasonable.
What I really like about Clockify is how easy it is for users to get a bird’s eye view of their time entries for the day, week, or month.
Once they clock in—which they can do from anywhere—they see a complete list of their time entries.
From there, they can easily check if anything is missing or incorrect. Without having to open a new window, they can edit times and add information or tags to projects. They can also use the time sheet to quickly confirm that everything is correct each week.

The reporting features in Clockify are quite good, bolstered by users’ ability to put so much information into their timesheets.
Administrators can get a real-time view of project budgets and see exactly what each person is working on.
There are many different reporting filters available to slice the data however you like. Get a quick read of how things are progressing for every individual, team, and client.
Clockify is loaded with features to help users stay on track like:
- Idle detection
- Time audit
- Required fields
- Alerts
- Bulk edit
- Offline mode
The free version of Clockify allows unlimited tracking, users, projects, and reports. It has all the great viewing and editing capability that make Clockify easy to use.
The paid plans, which are still a bargain, come with features that give administrators more control over who can see what, as well as advanced alerting and reporting features.
Here’s a breakdown of the Clockify pricing:
- Plus: $9.99/month
- Premium: $29.99/month
- Enterprise: $9.99/month per user
Integrations with Salesforce, G Suite, Freshbooks, and more than 50 other web apps make it easy to use Clockify for scheduling and payroll.
Shortlist Clockify if you need a budget-friendly time tracking solution with really helpful reporting features.
It’s not at the level of ERP software, for sure, but compared to other time tracking software, Clockify is fairly robust and really easy to navigate.
#2 – Time Doctor — Best for Employee Monitoring
Time Doctor has rich monitoring features. It’s a full-service time tracker that you can use for payroll and project management, but where it really steps away from the competition is the employee monitoring.
Once employees download Time Doctor, they create tasks and begin tracking time. Supervisors can see what tasks people are working on, as well as get insight on mouse and keyboard activity.

They may also enable screen shots taken at random intervals to confirm people stay on task.
Website and app monitoring is another really helpful facet of Time Doctor for both users and supervisors. You can quickly generate reports that show exactly how much time each person is spending on a website or application.
For supervisors, reports surface unproductive behaviors. With Time Doctor, you can set automatic alerts when users spend too much time on problematic websites and apps, or block them all together.
Moreover, users can better understand their work habits and where they are losing time.
There’s a lot more than just monitoring features included with Time Doctor, as it can handle:
- Timesheets & payroll
- Project management & budgeting
- Offline time tracking
- Productivity analysis
- Daily, weekly, monthly reports
Pricing for Time Doctor breaks down as follows:
- Basic: starting at $7/month per user
- Standard: starting at $10/month per user
- Premium: starting at $20/month per user
There is no free version of Time Doctor, but you can sign up for a 14-day free trial.
#3 – Toggl Track — Best for Holding Everyone Accountable
Toggl Track has a surprisingly feature-rich free forever version. For a freelancer or a consultant, this free time clock software can be used to track and invoice all their billable hours.
It’s an excellent app for personal accountability. To maintain focus, there’s an idle detector, automated reminders, and Pomodoro timer, which may change the way you work forever.
For teams, the paid plans are a little more on the expensive side, but that is because it’s able to collect and report so much information.
I especially like Timeline, Toggl Track’s background tracking feature, which records time entries for any app or website you use for more than 10 seconds. It’s an easy way to see how you’re really spending your time, and you can configure alerts to suggest tracking for specific actions, such as every time you join a certain call.
Automated alerts let you know when projects are nearing their estimated completion or are in danger of running over budget.

You can also automate email reminders for users who aren’t tracking their hours.
Toggl also has a really useful time auditing capability that helps you detect incorrect or unassigned time entries.
Some of the other features that help users save time include:
- Time tracking across all devices
- Chrome and Firefox browser extensions
- Team access levels
- Project templates
- Google Calendar integration
Some nice features, like time audits and being able to set required fields, are only available with paid subscriptions of Toggl Track.
There are three tiers to choose from:
- Starter: $9/month per user
- Premium: $18/month per user
- Enterprise: Contact Toggl sales for a custom pricing plan
The appeal of Toggl is that it really helps people hold themselves accountable. Between the automation and the robust monitoring, everyone is reminded of how they are spending their time.
#4 – TSheets– Best for GPS Time Tracking
TSheets is a great choice for employee payroll, especially if you have many people working in the field. It’s a favorite for property developers, construction companies, and other field service-oriented businesses.
It’s totally fine for shift work and salaries, but the GPS tracking features are where TSheets shines.
Employees clock in from the mobile app and managers can see exactly where they are in the Who’s Working window.

You can use geofencing to set specific areas for employee clock-in and they can upload pictures and a digital signature to confirm that everything’s done.
The real-time GPS data is also a boon for company coordination.
Quickly figure out who’s closest to the job-site for optimal deployments. Any changes to the schedule will trigger alerts to let everyone involved know about the new plan.
Some of the other really handy features include:
- Drag-and-drop scheduling tool
- Time clock kiosk
- Facial-recognition time clock
- Overtime tracking
- Reporting and forecasting
- Alert by text, email, or push notifications
TSheets has dozens of integrations on their App Marketplace, but I want to note that Quickbooks is made by the same company, Intuit. So, if you are using Quickbooks, know that TSheets is going to plug right in.
Pricing for TSheets is very reasonable:
- Premium: $8/month per user, plus $20 base fee
- Elite: $10/month per user, plus $40 base fee
Premium doesn’t have geofencing, digital signatures, and the advanced reporting features, but it has literally everything else.
In terms of a project management app, TSheets doesn’t let you get too granular, but you’ll be a master of the entire platform within a week. For workers, there’s not a lot of education needed to use it, which makes getting buy-in a lot easier.
#5 – Tick — Best for SMB Time Management
Tick is project-based time tracking software. It integrates nicely with tools like Trello, Asana, and Basecamp, helping managers keep projects on time and on budget.
In Tick, you create projects made up of tasks. Then, employees select the appropriate project and task, entering time from their desktop, mobile device, or even their Apple Watch.
You can set budgets for individual tasks within Tick, so managers have a better idea of where time is being lost within the larger project.

You can also create recurring projects, which can close at the end of the month and auto-duplicate for the next one. This is great for individuals and companies that use retainers or provide routine services for their clients.
The reporting capabilities in Tick are helpful for budget analysis and forecasting. Searching through data is really easy, by client, employee, project, or billable versus non-billable.
A lot of users like Tick’s auto-fill search, because they don’t have to browse for what they need.
Quite simply, Tick simplifies time management. With very little work on the user-side, those in control of the budget can make decisions based on accurate, real-time information.
Other key features of Tick include:
- Set running timers
- Assign people to projects
- Chrome extension
- Invoicing and payroll integrations
- Easy-edit time entry
- Bulk move time entry
A word about these last two features: It used to be that editing time entries in Tick was a real pain. They’ve since updated it so you can edit time directly in reports, as well as move all entries from one task or project to another.
Tick pricing is based on the number of projects you can create:
- 1 Project: Free
- 10 Projects: $19/month
- 30 Projects: $49/month
- 60 Projects: $79/month
- Unlimited Projects: $149/month
With every tier, you get unlimited users, clients, and tasks. It’s super affordable for any business.
I mean, if Tick saves you 2 hours, it’s already paid for several months of service.
I really recommend this product to teams that are using Trello, Asana, and especially Basecamp, which has really tight integration. It also integrates with Zapier and more than 750 other web apps.
There’s a 30-day free trial of Tick. If you think it could work for your business, you owe it to yourself to give it a try.
Summary
I don’t like to just hit expectations; I always want to over-deliver.
But my work has to be on time and on budget. It’s not possible to sustain a consistent level of service without a clear sense of how my time is spent.
The same holds true for both blue-collar moving companies and white-shoe law firms. Time is money.
Take control with time tracking software.
Individuals and small businesses should check out Clockify, Tick, and Toggl to see how far they can get with a free forever product.
Looking at those three options and thinking about larger teams and paid plans, Clockify is going to offer the best in-house reporting features. This can be really helpful for teams that are trying to track revenue and expenses across many projects.
For time management, SMBs are going to find that Tick has everything they need within an intuitive interface. It delivers a similar experience as Toggl at a lower cost. Choose Toggl if you want employee monitoring features, which you won’t get with Tick.
If you really need robust employee monitoring features, Time Doctor is the product for you. You get a lot more insight into how users are spending their time that you will with other time tracking software.
In the field, TSheets outperforms the competition. The GPS tracking features work beautifully, and the mobile app keeps remote workers up to speed.
The post Best Time Tracking Software appeared first on Neil Patel.
source https://neilpatel.com/blog/best-time-tracking-software/
Why You Should Create Mobile Ads for Engagement (and Not Just Conversion)

Optimizing mobile ads is a tactic in almost every business owner’s toolbox.
More often than not, the CTA on those ads is asking for a conversion of some sort. Maybe it’s a purchase, a subscription, or just free trial signup.
But is that all mobile ads are good for?
Is that even what mobile ads are best for?
If you’re using your mobile ads to sell, sell, sell, you may be wasting a lot of your ad spend, to be honest.
Mobile ads themselves aren’t a waste of money. They can actually be very helpful.
However, it’s time to stop thinking mobile ads are only good for increasing conversions.
I’m going to tell you why that’s the case. And then I’ll show you how to start doing that.
In this article, we’ll discuss why the most successful mobile ads are the ones that promote audience engagement.
Then you’ll see how to use your ads to promote engagement. And finally, you’ll discover how to promote the right engagement to set yourself up for future conversions
Let’s start by analyzing the pros and cons of advertising to a mobile audience.
Why Are Mobile Ads Not Just Good for Conversions?
I know what you’re thinking.
If the end goal of engagement is a conversion anyway, why not just streamline the process and run ads meant to convert?
There are several reasons:
Ads that are too pushy will be skilled, ignored, or otherwise avoided.
Just check out the findings from this HubSpot Research study. Namely, take a look at the top three reasons consumers use ad blockers:
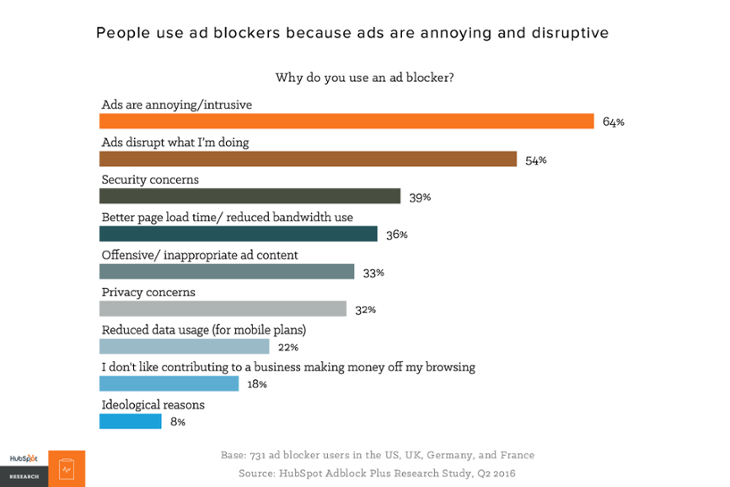
Ads made to convert can come off as annoying, disruptive, or even a security concern, instead of as helpful or engaging.
If that’s your ad, even those who don’t use ad blockers will ignore it. If you don’t make the value of your offer obvious and clear, your mobile ad will just fade into the background.
So that’s one reason a hard-sell conversion ad isn’t always a stellar idea. But why is this type of ad a pitfall for mobile advertisers specifically?
In short, many people still don’t buy things on their phones.
There’s no doubt that mobile commerce is on the rise — emarketer reports that mobile commerce will grow by 68% in 2022.
Despite the growth of mobile shopping, the majority of shoppers only use their phones to look up deals or product information — and then head to a store or a desktop to make big purchases.
In addition, some people want to see and touch a product in person. Or they want to watch full videos to explore all the features before pulling the trigger.
Finally, when users see your mobile ads on social media, they are often hearing about your business for the first time.
These consumers aren’t ready to purchase from you yet.
So why would you spend money on an ad asking them to?
The most effective social media ads raise awareness for your brand. Like in any setting, social media users need to move down the sales funnel before they can convert.
With all that in mind, it’s important to make your next mobile ad worth your visitors’ time.
In other words, it’s important to make your next mobile ad engaging.
What is Mobile Engagement?
There are four types of engagement that you can generate with an ad.
The first is probably the one you’re most familiar with: landing page engagement.
Your ad redirects consumers to your site, where they complete actions like filling out your form, making a purchase, and so on.
As a business, this is your end goal. But as we discussed in the last section, going the direct route to a conversion isn’t easy with mobile ads. Trying to do so can waste a lot of resources.
That’s where the other types of engagement come in.
One alternative engagement type is a website visit.
You can gauge this from metrics like bounce rate and average session times.
An ad asking someone to read a blog post would promote website engagement because blog posts typically see longer session times than other pages.
Another type is social media engagement.
When fans or followers interact with your social media page — liking, sharing, commenting, or using your personal hashtag — they are engaging with your brand.
Finally, there’s brand engagement.
This is measured through metrics like customer loyalty and repeat business.
It can also be measured by your Net Promoter Score. This is a score based on how many customers like your brand and how many see room for improvement.

The Net Promoter Score is one of the best ways to improve customer retention over the long-term.
So how exactly do all these types of engagement make you money?
For starters, increasing any of these types of engagement will strengthen a customer’s trust in your brand.
That’s a necessity if you eventually want them to convert. People won’t buy from brands they don’t trust.
But it’s more than that.
When someone engages with your ad — downloads your ebook or watches your video, for example — you can track that.
Then, you can create a custom audience of the people who completed this specific action.
You can retarget them later with the perfect ad to continue leading them toward a conversion.
Mobile ads are the perfect way to increase all three alternative types of engagement. Up next, we’ll look at four essential tips to make your engagement ads stand out.
1. Know Your Mobile Audience
Mobile users behave differently than desktop users.
That means they have their own set of analytics to consider.
For example, the data below represents traffic that arrived to a friend’s site from a mobile Facebook ad:

Note the highlighted metrics.
Mobile users visited nearly three pages per session, spent nearly six minutes on the site, and had a bounce rate of 77.78%.
Below, you can see that most of these users visited the site during evening hours.
Now compare that with users who arrived at the site from a desktop Facebook ad:
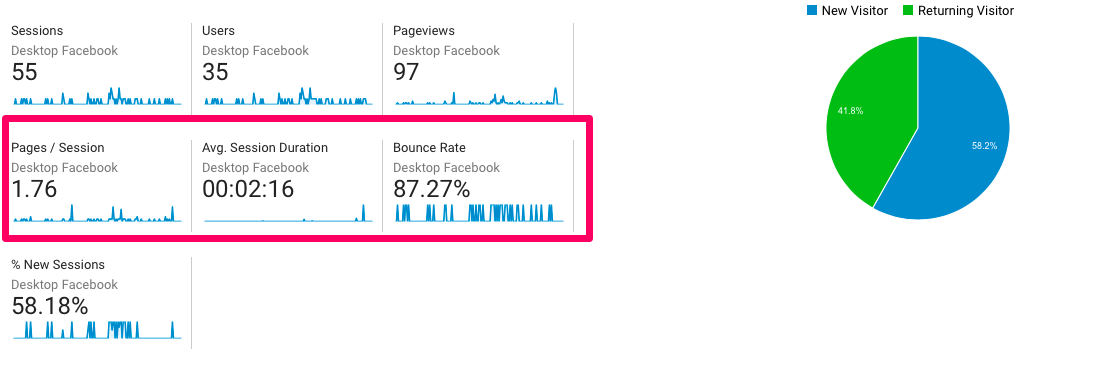
These users explored the site less thoroughly than mobile users, resulting in a higher bounce rate. Meanwhile, desktop users visited more consistently throughout the day:
Evaluating this information will be a huge help when you decide how, where, and when you are going to engage your audience.
Will you run ads at a specific time of day? Will you direct them to your landing page or to a blog post or feature page?
You can learn both the demographics and psychographics of your mobile audience to maximize your reach.
All the info you need is available in your Google Analytics.
To start, create a segment of visitors who arrived at your site from a mobile Facebook ad. Here’s how:
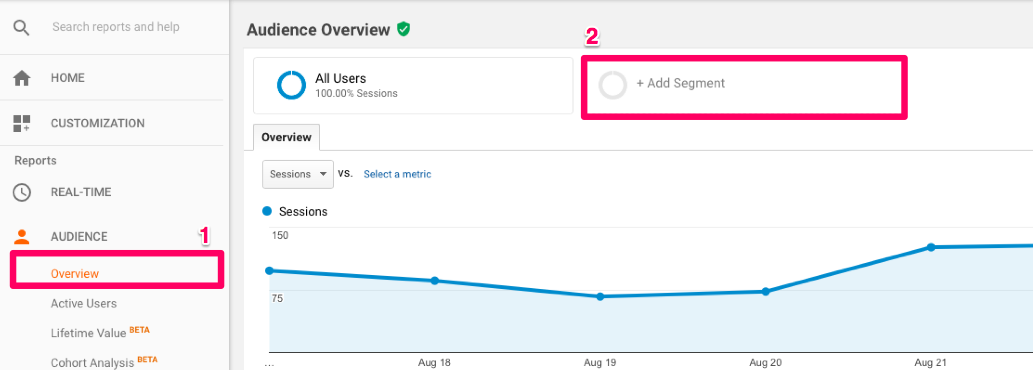
- In Google Analytics, click on Audience and then Overview.
- In the new report that appears, select “+Add Segment.”
Your next step is to click on “+New Segment,” as shown below.

You’ll then see a menu that looks like this:
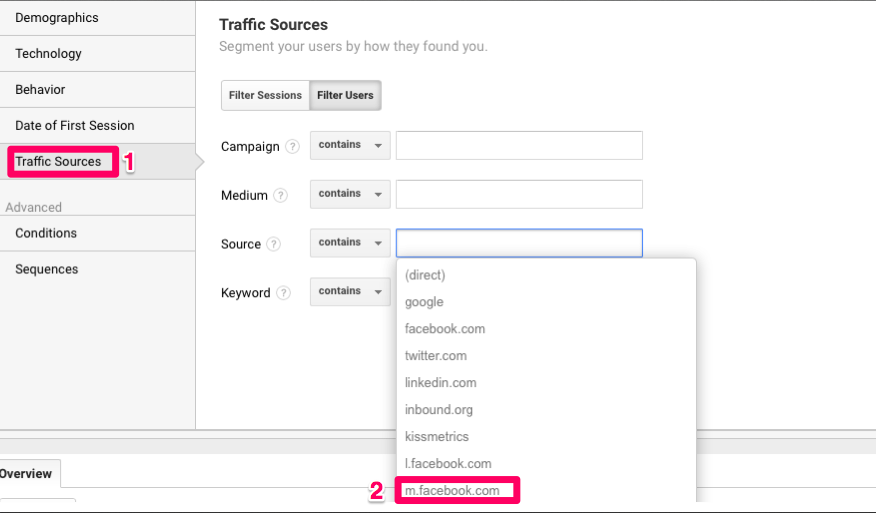
- Select Traffic Sources.
- Click in the field for “Source contains.” A drop-down menu will list the sources that bring visitors to your site. Select Facebook mobile: m.facebook.com.
Save your changes and bingo! Segment created.
From here, you can track analytics for this specific group. Discover what speaks to this audience to learn who they are and, consequently, who you should be designing your ad for.
2. Use Mobile Native Advertising
Mobile native advertising is an ad format that allows an ad to blend in with the app or mobile site on which it runs.
The advertiser usually purchases the space on which a mobile native ad runs.
This form of advertising is particularly popular because it’s known for increasing engagement.
There are eight types of mobile native advertising. But for now, we’re going to look at three you’re most likely to recognize.
The first is In-Feed Social advertising.
This is the Facebook ad that isn’t on the right sidebar. It’s smack in the middle of someone’s feed, appearing just like a regular post would.
Here’s an example from Mountain Standard:

The second type, In-Feed Content, is very similar to the first.
However, instead of these ads being made to look like a social media post, they’re made to look like the content of the site on which the ad runs.
For example, take a look at how this sponsored Live Science article blends in with articles on Yahoo:
Without the “Sponsored” tag, even the most detail-oriented visitor would think this was just a regular article.
Last but not least: Paid Search ads.
You’ve probably heard a lot about this one. Google AdWords ads that appear on search engine result pages are the primary example, such as this ad for MailChimp:
Because native ads blend in with content, they have a huge advantage over more ads-y ads like Google Shopping ads.
Native ads reach customers who have “banner blindness.”
These ads are more likely to be seen and engaged with because they’re placed where the most engagement already is: the content areas.
Logic’s on our side here and so are the numbers.
According to data published by MediaPost, consumers interact with native ads up to 60% more than they do with banner ads.
So what’s the catch? It’s more like a caution, actually.
You have to make sure you aren’t misleading your readers.
Someone scanning through search engine results could easily mistake your ad for an unsponsored result. And if they click your link only to realize you’re trying to sell them something?
You may have a problem on your hands.
Because according to Contently, 48% of consumers feel deceived in this situation:
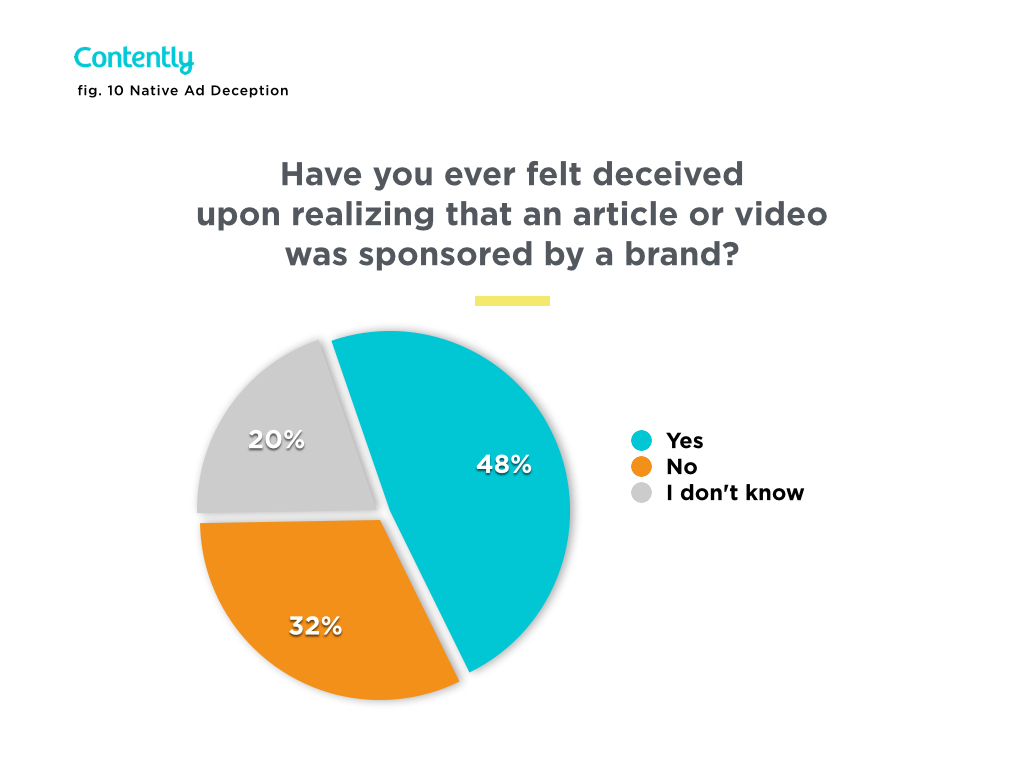
You don’t want to be deceptive. If your ad blends in a little too well, go the extra mile to make your intentions clear.
In this example, the Denver Post and KB Home added the word “Sponsored” in the ad text to prevent confusion.

You do want to be in places where you’ll get seen, but you don’t want to trick users into clicking.
Avoid the deception by adding one or two words or obvious branding elements to your ad.
3. Build Trust with Mobile Ads
It’s easy to say you should “build trust.”
But how, exactly, does someone accomplish that feat?
It helps to think about the reasons you trust your favorite brands.
I’d wager a guess that one of the reasons is you don’t feel like they’re “only in it for themselves.”
Their product benefits you just as much as your money benefits them.
The brands you like are helpful. And, by keeping that in mind when designing your ads, your brand can be the same way.
Say you’re running an ad through AdWords.
If you want to be helpful, then you have to think about what Google searchers are trying to accomplish at the time they see your ad.
According to Textbroker, there are three reasons why people use Google: to buy something, to find a page, or to get information.
Searchers in the first category probably don’t need your help. At least, they don’t think they do.
But searchers in the second two categories are often searching for answers.
You can provide these answers by redirecting users to your online resources.
To get the most clicks, avoid making these ads super salesy.
Your headline, body, and CTA should be conversational. All you’re trying to do is communicate that you can help consumers solve their problem.
For example, Top10AntivirusSoftware.com runs this ad on the antivirus software SERP:
This ad provides a list of the best antivirus software to help users decide what to buy.
The website offers helpful features, like comparing offers side-by-side, to build a good relationship with the user — even if that means they don’t convert today.
You can also use engagement ads to offer a resource. Type “data analytics” into Google, and you might see this SAS ad:

Once again, this ad isn’t trying to sell me anything. At least not immediately.
It isn’t even taking me to the site’s homepage.
But by offering me a free download, they still establish themselves as a reliable business in my mind.
They want to establish themselves as a thought leader in the industry.
Another way to use ads is to remind your audience you are an authority.
Don’t be shy. Tell them outright why you are the best at what you do.
After all, if you didn’t think you were the best, you wouldn’t be doing it.
And chances are, there are plenty of others who agree with you.
So use this to your advantage. Run ads that link to your popular content, your favorite customer testimonials, or a page announcing your recent accomplishments.
Filson does this by running a video ad about what they’re proud of.
Here’s one example of their partnership with the United States Forest Service:

Just remember that listing your accomplishments won’t help much if your viewer doesn’t know what the next step is.
Include a CTA, even “read more” or “watch more,” to get users to your site.
4. Say No to Page Likes Ads
One of the best ways to get to know someone is to stalk their Facebook likes.
Said no one ever.
But if this were true, it would be really easy to know someone like the back of your hand. After all, Facebook’s always telling you that your friends like this page or that brand.
These are Page Likes ads, and they appear on both desktop and mobile.
Here’s an example of a Page Likes ad from Sprout Social:

If you use Facebook, you can probably think of at least ten Page Likes ads you’ve seen in the past.
Which begs the question: Why are these ads so popular?
Businesses use Page Likes ads to:
- Tap into a person’s desire to emulate others
- Benefit from people’s natural trust of their friends
After all, according to ReportLinker, 89% of people would trust their friend over an anonymous online review.
So why did the last subhead read “Say no to Page Likes ads?”
Well, because Facebook likes aren’t as cheap as you think.
Yes, they do matter. You do want people to like your page. But unfortunately, there could be many people who like your page and never see your content.
Facebook is making it harder and harder to appear in your fans’ feeds.
As a result, you’ll often have to part with additional cash to boost your post and get the person whose “like” you bought to see your content.
Buying a like is a never-ending cycle of payment.
So what should you do instead?
When posting on your page, the nicest thing you can do for yourself is to include a video.
According to Marketing Land, your posts will reach most of your fans if you incorporate video content.
Create a video that raises awareness about a problem you can solve. Your fans will watch your video, and that first marketing seed will be planted.
Next, it’s time to advertise. But not with Page Likes ads. Instead, you’re going to run a specific engagement ad for a custom audience.
Use Facebook custom audiences to remind the people who watched your video of both their problem and your solution.
Just go into your Facebook Ads account and create a custom audience based on video views.
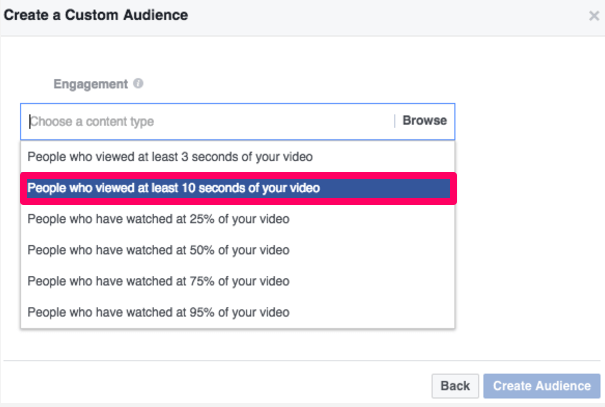
Your ad will appear for people who have engaged in that way. But what will your ad say?
At this point, your mobile audience still isn’t ready to convert. You can get them closer with your next ad.
One way you can do this is by making your fans’ lives better.
Offer free resources to help solve their new problem. Now that they’ve watched your video, they won’t be wondering why they would possibly ever want to read your free guide.
Here’s an example from Audible:

You also may choose to run a drip campaign that convinces users to take a free course on how to solve their problem.
This image from AdEspresso shows an example of how Founder Institute does this:

Your last option is to solve their problem right away, for free, and save the sale for a future problem.
You can immediately offer solutions like articles or checklists to establish a good relationship between you and your potential leads.
Here’s another AdEspresso example for Bonobos:

In every situation, offer solutions that are consistent with the problem you mentioned before.
Whether you solve their problem now or later, your dedication to providing a solution will encourage mobile users to engage.
Conclusion
Mobile ads just aren’t just for conversions.
Despite the growth in mobile shopping, some shoppers still hesitate to make a purchase on their mobile device.
Many Facebook users don’t know enough about you to buy from you.
And finally, ads that are too sales-y or pushy are likley to be ignored.
Luckily, conversions aren’t the only type of engagement. By using your mobile ads to promote website engagement, social media engagement, and brand engagement, you’ll make it easy to convert your customers later on.
Before you start creating your ad, study analytics for your mobile users specifically.
Use mobile native advertising to optimize engagement, and create ads that encourage your audience to trust your brand.
Finally, don’t engage with Facebook Page Likes ads. Instead, get the most out of Facebook ads by creating custom audiences so that you can follow up with them in the future.
What’s the best mobile advertising tip you’ve used to generate more leads and customers?
The post Why You Should Create Mobile Ads for Engagement (and Not Just Conversion) appeared first on Neil Patel.
How to Create and Use Facebook Polls

Facebook Polls can help you unravel the problems of your audience, what you should create next, and their true sentiments about your brand. While it can help you make more strategic business decisions, Facebook Polls can do other wonderful things for your online presence like:
- Boost your Facebook page’s engagement (asking questions is one of the best ways to generate high engagement)
- Help you beat the newsfeed algorithm without ads
- Foster a strong sense of community around your brand
In this post, you’ll learn all the different ways you can create polls on Facebook, how to use them effectively, and how polling your audience can help your business grow.
How to Create Facebook Polls
Gone are the days you could create a Facebook poll from your Newsfeed or timeline. At the moment, the only way you can share a poll is on a Facebook Group, a story, an event page, or on Messenger.
Facebook Group Polls
Facebook Groups are one of the best tools for brands on the social media platform. It allows you to create a community and improve customer engagement.
While Business Pages struggle to get an organic reach above 5%, Facebook Groups are different. The algorithm pushes group posts to newsfeeds, which means you have a much higher organic reach without paying for ads.
Below, we break down the steps to create a poll within your group with an actual profile and business page example.
Step 1: Go Your Group
On your desktop or mobile, go to your Facebook Newsfeed, click on the “Groups” icon on the left-hand side menu and select the group for your poll.
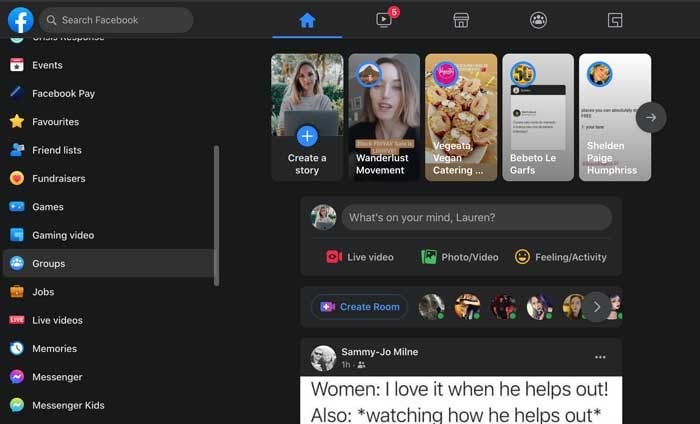
Step 2: Create a Post
Click the “What’s on your mind” section to create a post. When the pop-up loads, navigate to the “Add to your post” section and click on the three dots to see more options.
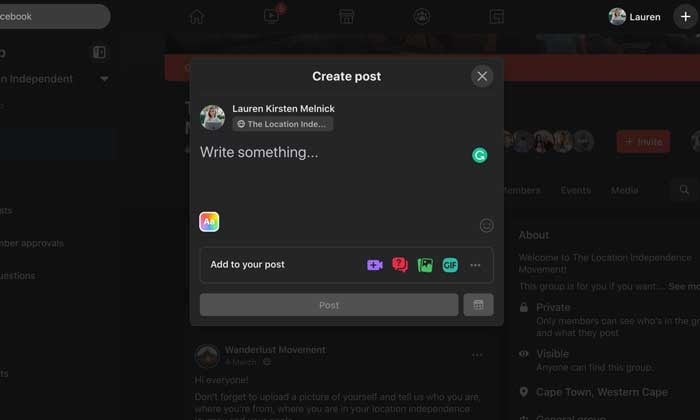
Step 3: Create Your Poll
A new “Add to your post” screen will load with various options. Select “Poll” from the list. It will take you back to the “Create post” pop-up, and you can start adding your poll options in the “Write something” section.
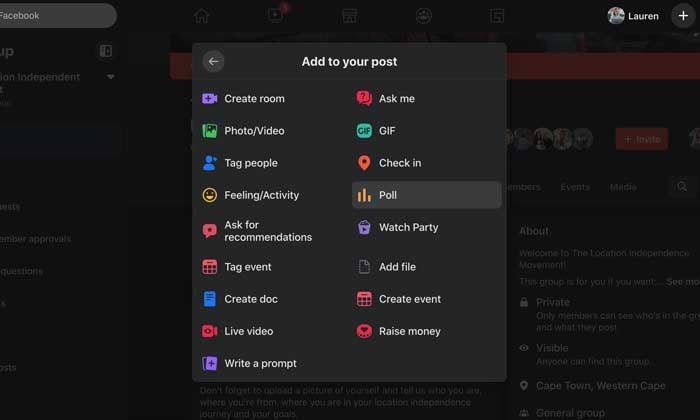
Step 4: Publish Your Poll
When you’ve added all your options, click on “Poll Options.” Here you can choose if people can add options and if they can vote for more than one option.
Once you’re done, click “Post.”
Facebook Story Polls
With 250 million people using Stories every day and it’s prime real estate on users’ News Feeds, creating a poll is an invaluable (and fun!) way to connect with your audience.
Let’s see how it’s done.
Step 1: Open the Facebook App on Your Smartphone
Navigate to your Facebook Page by tapping on the “Hamburger” icon on the left-hand side of the screen. You’ll see your page in your shortcuts section or by scrolling down and tapping on the “Pages” button.
Step 2: Create a New Story
Tap on the blue circle with the plus sign around your profile picture and select “Create a Story” from the dropdown list.
Step 3: Create a Poll
Swipe to the left until you see the “Poll” card. Write your question and customize the “Yes” and “No” options.
Choose a color gradient background or upload a photo from your camera roll.
When you’re done, tap the “Share Now” button.
Your followers will see the percentage of who voted for which option but only you can see how many votes each option received and how each person voted.
Facebook Messenger Polls
While you can no longer post polls on your News Feed, Facebook added the functionality to group chats in Messenger for your personal account.
Hopefully, Facebook will roll out the feature to chats for business pages. It would be an excellent way to carry out quick customer satisfaction surveys.
Here’s how to do it.
Step 1: Open a Group Chat or Create a New One

Step 2: Tap the “+” at the Bottom of the Messenger Window Next to the Text Box
Step 3: Select the Poll Icon and Type in Your Question
Step 4: Add Your Options and Tap “Create a Poll”
Doing this allows you to share it with your group.
Event Page Polls
Polls are a powerful feature for brands who host in-person or virtual events.
You can create one to get valuable input on details like:
- Which location, date, or time suits everyone.
- Attendees’ opinions on how the event went.
- How many people want specific catering options.
- Voting on itinerary options.
Step 1: Go to the Event
Log into your Facebook account and click on “Events” on the left-hand side of the screen. If you don’t see the event icon, click on the expand button and scroll down until you see it.
For events created by a Facebook Business Page, go straight to the events tab on your page.
Step 2: Create a Post
Select the event you want, click on the “Discussion” tab and select “Add a Post.”
A new window will pop up, and you’ll see the poll icon on the right-hand side of the “Add a Post” section.
If you don’t see it, tap on the three dots to expand the post options.
Step 3: Create a Poll
Click on the poll icon, and you’ll go back to the “create a post” screen where you can add your question and options.
You can add more possible answers by clicking the “+Add Option”. Use “Poll Options” to allow people to add options and enable/disable people from choosing multiple answers.
When you’re ready to post, click on the “Post” button to add it to your event’s page.
Facebook Video Polls
With 500 million people on Facebook watching videos every day, you can’t go wrong with adding video content to your marketing mix.
But how do you get people to ENGAGE with it once it’s posted?
Video polls.
It’s a quick and easy way to personalize a viewer’s watch experience and get them to snap out of passively consuming content.
We tell you how to do it below.
Step 1: Upload a Video to Your Facebook Page
You can also head on over to Creator Studio to edit a video you’ve already posted to your page.
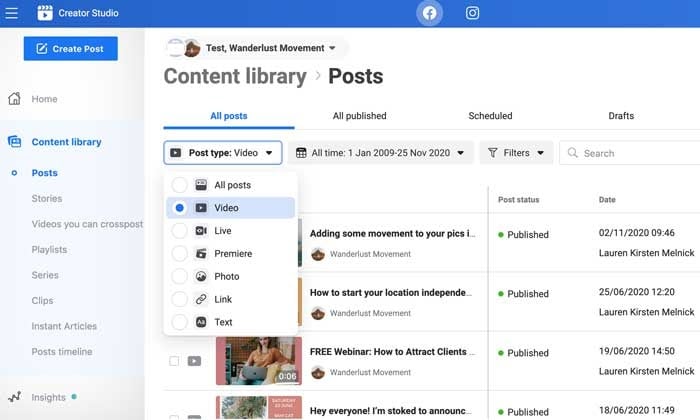
Step 2: Click the “Edit Post” Button
A new window will load where you can edit your video’s title, caption, and tags.
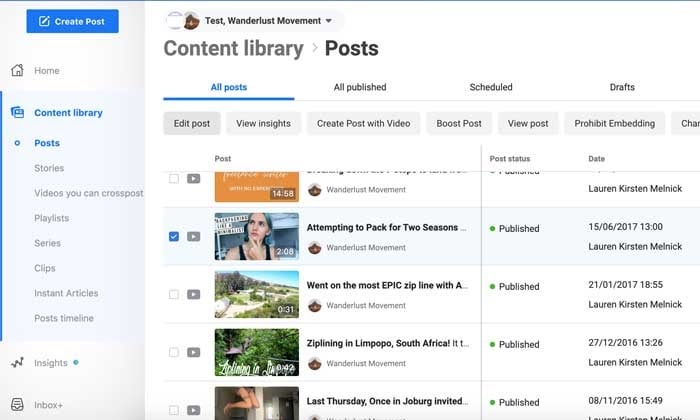
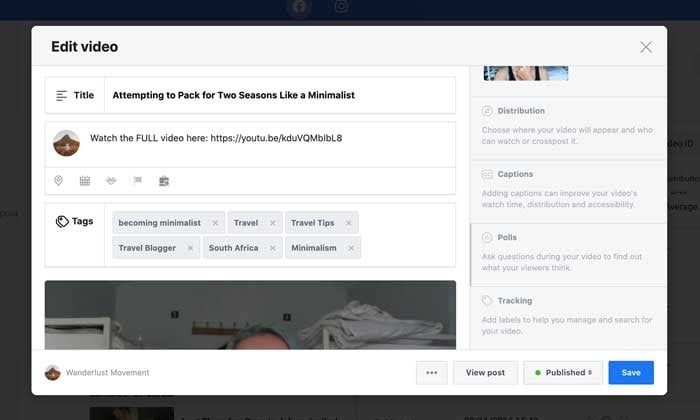
Step 3: Select the “Polls” Option
On the right-hand side of the pop-up, scroll down until you see a greyed out “Poll” section.
Select it and click on the blue “Create Poll” button.
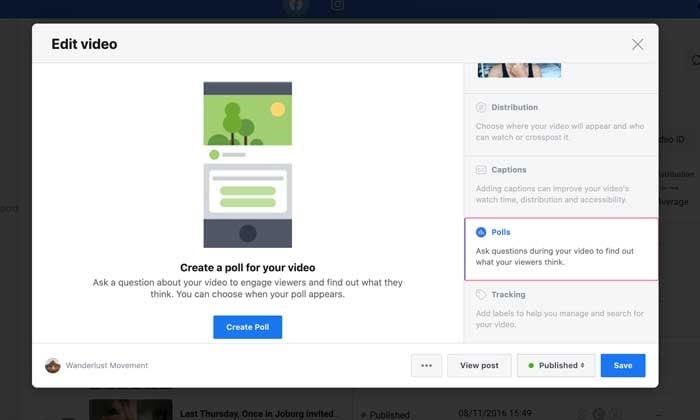
Step 4: Ask Your Question
On the left-hand side of the pop-up, your video will appear with a slider. You can move it to the section of your video where you want the poll to appear.
On the right-hand side, you can fill in your question and answer options. By default, there are only two options to start with, but you can add up to six by clicking on the “+Add another option” button.
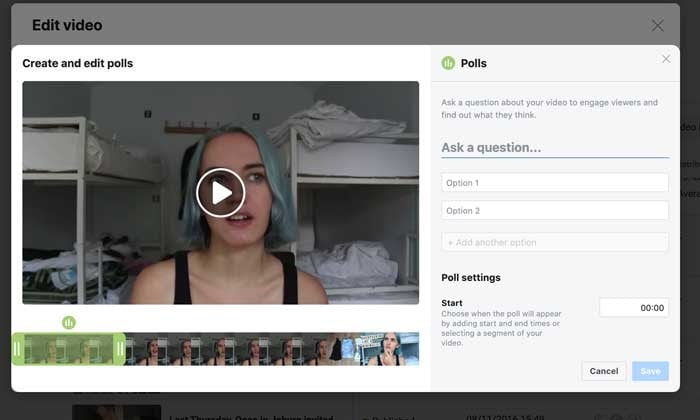
Step 5: Choose Your Poll Settings
Scroll down further to finalize your poll settings. You can specify when you want the poll to show up, its duration, and when you want to publish the results.
Step 6: Save Your Facebook Video Poll
When you’re happy with your poll, click on the “Save” button to start collecting results!
5 Ways to Use Facebook Polls to Grow Your Business
Here are some of the ways you can take advantage of polling your audience to grow your community and make more sales.
Create Different Types of Facebook Polls
You don’t have to stick to boring ol’ text polls. Facebook lets you spice things up and stop mindless scrolling in its tracks by adding images and GIFs to your polls.
Use the different options to get creative, show off your brand personality, and encourage engagement.
Ask the Right Questions
Polls are an excellent way to start a discussion in your community and conduct valuable market research.
For example, if you create a poll around content marketing, you can ask questions like:
- “Do you see results from your content marketing?”
- “What’s your biggest struggle with content marketing?”
- “Do you struggle to see an ROI from your content marketing?”
You can use the results to plan out your content calendar, brainstorm a new offer, or create a piece of gated content your audience will love.
Collect Feedback From Your Audience
Hosting a free training for your private Facebook Group community? Get feedback on how your audience enjoyed the content with a poll. Instead of guessing if your training resonated with your community, you can ask them directly and use the feedback to fine-tune your content. A quick poll question like “Did you find the training actionable and easy-to-understand?” will do the trick.
Learn About Your Audience
Your Facebook polls don’t need to be strictly business all day every day. You can use the feature to go beyond basic demographics and find out what makes your audience tick.
For example:
- What colors do they prefer?
- Who are their favorite influencers?
- Where do they hang out online and offline?
- What are their biggest values?
- What is the big goal they’re working towards?
Polls can collect meaningful information you use to make your brand more relatable and marketable to your audience.
Use a Slight Touch of Controversy
Want to stir up some engagement? Create a poll around two different schools of thought in your industry.
For example, if you work with freelancers you could ask, “Do you find platforms like Upwork and Fiverr valuable for landing clients?”
There are strong opinions about the pros and cons of using content mills, and it’s a hot topic in the freelancing community. Creating a poll around this will spike likes and comments, forcing the algorithm to push it out to more users.
How Facebook Polls Can Help Your Business
Still not convinced of the impact Facebook Polls can have on your business? Here’s how they can boost audience engagement, brand awareness, and help you sell your products before you’re ready to launch.
Boost Your Engagement and Brand Awareness
As AdWeek points out, consumer engagement on Facebook with brands is volatile. Polls are an easy way to encourage your community to engage with your content and build a relationship with your fans.
With multiple ways to interact (liking, commenting, sharing), you can feed the algorithm all the signals it needs to serve your post out to more and more users. For users, polls break up monotonous scrolling and allows them to share their opinion quickly and easily.
Find Out What to Create Next
The key to a successful online business is to create things your audience wants.
While keyword and market research can go a long way to get you there, once you’ve built a community, it’s better to go straight to the source. Use a poll to ask your followers what they want to see next.
For example, you could offer several topic ideas for your next blog post, YouTube video, or online course. Can’t decide what color to use for your new t-shirt designs? Create a poll and give your audience what they want!
Stir Up Interest Before a Launch
Before your next launch, use polls to start teasing your new products or services. For example, if you’re a clothing company, you can post pictures of your soon-to-be-released hoodies and ask people to vote on their favorite style. Not only is it a way for you to see what’s resonating with your audience, it creates anticipation for your launch.
Discover the Opinion of Your Followers
Remember the old days of focus groups as a marketing tactic? You can get the same results for FREE and in a shorter amount of time with polls.
Use Facebook polls to find out:
- What your followers like about your brand.
- What they would change.
- Their overall opinion on your products or services.
Once you know people’s opinions, it’s much easier to speak their “language”, change things up, and align your marketing messaging with your audience’s wants and needs.
Conclusion
Polls are an important tool for any brand. They are an instant connection to how your audience feels about you, their struggles, and how you can best solve their problems.
By asking the right questions, you can adjust your digital marketing strategy to match the needs of your followers and give them that “WOW this was made for me” experience.
How will you use Facebook Polls to serve your customers better?
The post How to Create and Use Facebook Polls appeared first on Neil Patel.
source https://neilpatel.com/blog/8-tools-create-highly-engaging-facebook-polls/
How to Create and Use Facebook Polls

Facebook Polls can help you unravel the problems of your audience, what you should create next, and their true sentiments about your brand. While it can help you make more strategic business decisions, Facebook Polls can do other wonderful things for your online presence like:
- Boost your Facebook page’s engagement (asking questions is one of the best ways to generate high engagement)
- Help you beat the newsfeed algorithm without ads
- Foster a strong sense of community around your brand
In this post, you’ll learn all the different ways you can create polls on Facebook, how to use them effectively, and how polling your audience can help your business grow.
How to Create Facebook Polls
Gone are the days you could create a Facebook poll from your Newsfeed or timeline. At the moment, the only way you can share a poll is on a Facebook Group, a story, an event page, or on Messenger.
Facebook Group Polls
Facebook Groups are one of the best tools for brands on the social media platform. It allows you to create a community and improve customer engagement.
While Business Pages struggle to get an organic reach above 5%, Facebook Groups are different. The algorithm pushes group posts to newsfeeds, which means you have a much higher organic reach without paying for ads.
Below, we break down the steps to create a poll within your group with an actual profile and business page example.
Step 1: Go Your Group
On your desktop or mobile, go to your Facebook Newsfeed, click on the “Groups” icon on the left-hand side menu and select the group for your poll.

Step 2: Create a Post
Click the “What’s on your mind” section to create a post. When the pop-up loads, navigate to the “Add to your post” section and click on the three dots to see more options.

Step 3: Create Your Poll
A new “Add to your post” screen will load with various options. Select “Poll” from the list. It will take you back to the “Create post” pop-up, and you can start adding your poll options in the “Write something” section.


Step 4: Publish Your Poll
When you’ve added all your options, click on “Poll Options.” Here you can choose if people can add options and if they can vote for more than one option.
Once you’re done, click “Post.”


Facebook Story Polls
With 250 million people using Stories every day and it’s prime real estate on users’ News Feeds, creating a poll is an invaluable (and fun!) way to connect with your audience.
Let’s see how it’s done.
Step 1: Open the Facebook App on Your Smartphone
Navigate to your Facebook Page by tapping on the “Hamburger” icon on the left-hand side of the screen. You’ll see your page in your shortcuts section or by scrolling down and tapping on the “Pages” button.

Step 2: Create a New Story
Tap on the blue circle with the plus sign around your profile picture and select “Create a Story” from the dropdown list.

Step 3: Create a Poll
Swipe to the left until you see the “Poll” card. Write your question and customize the “Yes” and “No” options.
Choose a color gradient background or upload a photo from your camera roll.
When you’re done, tap the “Share Now” button.
Your followers will see the percentage of who voted for which option but only you can see how many votes each option received and how each person voted.

Facebook Messenger Polls
While you can no longer post polls on your News Feed, Facebook added the functionality to group chats in Messenger for your personal account.
Hopefully, Facebook will roll out the feature to chats for business pages. It would be an excellent way to carry out quick customer satisfaction surveys.
Here’s how to do it.
Step 1: Open a Group Chat or Create a New One

Step 2: Tap the “+” at the Bottom of the Messenger Window Next to the Text Box
Step 3: Select the Poll Icon and Type in Your Question

Step 4: Add Your Options and Tap “Create a Poll”
Doing this allows you to share it with your group.

Event Page Polls
Polls are a powerful feature for brands who host in-person or virtual events.
You can create one to get valuable input on details like:
- Which location, date, or time suits everyone.
- Attendees’ opinions on how the event went.
- How many people want specific catering options.
- Voting on itinerary options.
Step 1: Go to the Event
Log into your Facebook account and click on “Events” on the left-hand side of the screen. If you don’t see the event icon, click on the expand button and scroll down until you see it.
For events created by a Facebook Business Page, go straight to the events tab on your page.

Step 2: Create a Post
Select the event you want, click on the “Discussion” tab and select “Add a Post.”
A new window will pop up, and you’ll see the poll icon on the right-hand side of the “Add a Post” section.
If you don’t see it, tap on the three dots to expand the post options.


Step 3: Create a Poll
Click on the poll icon, and you’ll go back to the “create a post” screen where you can add your question and options.
You can add more possible answers by clicking the “+Add Option”. Use “Poll Options” to allow people to add options and enable/disable people from choosing multiple answers.
When you’re ready to post, click on the “Post” button to add it to your event’s page.

Facebook Video Polls
With 500 million people on Facebook watching videos every day, you can’t go wrong with adding video content to your marketing mix.
But how do you get people to ENGAGE with it once it’s posted?
Video polls.
It’s a quick and easy way to personalize a viewer’s watch experience and get them to snap out of passively consuming content.
We tell you how to do it below.
Step 1: Upload a Video to Your Facebook Page
You can also head on over to Creator Studio to edit a video you’ve already posted to your page.

Step 2: Click the “Edit Post” Button
A new window will load where you can edit your video’s title, caption, and tags.


Step 3: Select the “Polls” Option
On the right-hand side of the pop-up, scroll down until you see a greyed out “Poll” section.
Select it and click on the blue “Create Poll” button.

Step 4: Ask Your Question
On the left-hand side of the pop-up, your video will appear with a slider. You can move it to the section of your video where you want the poll to appear.
On the right-hand side, you can fill in your question and answer options. By default, there are only two options to start with, but you can add up to six by clicking on the “+Add another option” button.

Step 5: Choose Your Poll Settings
Scroll down further to finalize your poll settings. You can specify when you want the poll to show up, its duration, and when you want to publish the results.
Step 6: Save Your Facebook Video Poll
When you’re happy with your poll, click on the “Save” button to start collecting results!
5 Ways to Use Facebook Polls to Grow Your Business
Here are some of the ways you can take advantage of polling your audience to grow your community and make more sales.
Create Different Types of Facebook Polls
You don’t have to stick to boring ol’ text polls. Facebook lets you spice things up and stop mindless scrolling in its tracks by adding images and GIFs to your polls.
Use the different options to get creative, show off your brand personality, and encourage engagement.
Ask the Right Questions
Polls are an excellent way to start a discussion in your community and conduct valuable market research.
For example, if you create a poll around content marketing, you can ask questions like:
- “Do you see results from your content marketing?”
- “What’s your biggest struggle with content marketing?”
- “Do you struggle to see an ROI from your content marketing?”
You can use the results to plan out your content calendar, brainstorm a new offer, or create a piece of gated content your audience will love.
Collect Feedback From Your Audience
Hosting a free training for your private Facebook Group community? Get feedback on how your audience enjoyed the content with a poll. Instead of guessing if your training resonated with your community, you can ask them directly and use the feedback to fine-tune your content. A quick poll question like “Did you find the training actionable and easy-to-understand?” will do the trick.
Learn About Your Audience
Your Facebook polls don’t need to be strictly business all day every day. You can use the feature to go beyond basic demographics and find out what makes your audience tick.
For example:
- What colors do they prefer?
- Who are their favorite influencers?
- Where do they hang out online and offline?
- What are their biggest values?
- What is the big goal they’re working towards?
Polls can collect meaningful information you use to make your brand more relatable and marketable to your audience.
Use a Slight Touch of Controversy
Want to stir up some engagement? Create a poll around two different schools of thought in your industry.
For example, if you work with freelancers you could ask, “Do you find platforms like Upwork and Fiverr valuable for landing clients?”
There are strong opinions about the pros and cons of using content mills, and it’s a hot topic in the freelancing community. Creating a poll around this will spike likes and comments, forcing the algorithm to push it out to more users.
How Facebook Polls Can Help Your Business
Still not convinced of the impact Facebook Polls can have on your business? Here’s how they can boost audience engagement, brand awareness, and help you sell your products before you’re ready to launch.
Boost Your Engagement and Brand Awareness
As AdWeek points out, consumer engagement on Facebook with brands is volatile. Polls are an easy way to encourage your community to engage with your content and build a relationship with your fans.
With multiple ways to interact (liking, commenting, sharing), you can feed the algorithm all the signals it needs to serve your post out to more and more users. For users, polls break up monotonous scrolling and allows them to share their opinion quickly and easily.
Find Out What to Create Next
The key to a successful online business is to create things your audience wants.
While keyword and market research can go a long way to get you there, once you’ve built a community, it’s better to go straight to the source. Use a poll to ask your followers what they want to see next.
For example, you could offer several topic ideas for your next blog post, YouTube video, or online course. Can’t decide what color to use for your new t-shirt designs? Create a poll and give your audience what they want!
Stir Up Interest Before a Launch
Before your next launch, use polls to start teasing your new products or services. For example, if you’re a clothing company, you can post pictures of your soon-to-be-released hoodies and ask people to vote on their favorite style. Not only is it a way for you to see what’s resonating with your audience, it creates anticipation for your launch.
Discover the Opinion of Your Followers
Remember the old days of focus groups as a marketing tactic? You can get the same results for FREE and in a shorter amount of time with polls.
Use Facebook polls to find out:
- What your followers like about your brand.
- What they would change.
- Their overall opinion on your products or services.
Once you know people’s opinions, it’s much easier to speak their “language”, change things up, and align your marketing messaging with your audience’s wants and needs.
Conclusion
Polls are an important tool for any brand. They are an instant connection to how your audience feels about you, their struggles, and how you can best solve their problems.
By asking the right questions, you can adjust your digital marketing strategy to match the needs of your followers and give them that “WOW this was made for me” experience.
How will you use Facebook Polls to serve your customers better?
The post How to Create and Use Facebook Polls appeared first on Neil Patel.
source https://neilpatel.com/blog/8-tools-create-highly-engaging-facebook-polls/
The Simple Guide to Using Pivot Tables to Understand Marketing Data

Does the word “pivot table” make you want to scream?
You aren’t alone.
But, if you aren’t using pivot tables, you could be missing out on valuable insights about the effectiveness of your SEO, social media, or content marketing campaigns.
Data is the most powerful resource on the planet right now — some are even calling it the “new oil.” But, are you making the most of your marketing data?
If you already have a good grasp of the basics of Excel or Google Sheets, then you have a head start.
But I’m here to take you beyond the basic functions like SUM, AVG, or adding new rows.
You should be using Microsoft Excel to analyze and organize data from your marketing efforts.
Why? Because it’s one of the most underutilized marketing assets out there.

It’s safe to say that you probably know how to input numbers, words, dollar amounts, and other figures into the rows and columns of an Excel spreadsheet.
If that’s all you’re using Excel for, you’re not utilizing the software to its full potential.
Why?
It’s tough to analyze large data sets without the help of visual aids.
This is where you can use a pivot table to make your life easier.
What is a Pivot Table, Anyway?
A pivot table is an interactive table that allows you to sort and display data based on filters.
For example, say you have a massive Excel document of all your customer complaints about your large e-commerce business. It’s a lot of data — but it doesn’t actually tell you anything.
A pivot table could display averages about complaints by category, location, date purchased, and any other fields that you have.
But that’s just the basics. These fairly simple tables can do a lot more.
You can also use them to compare similar data and figures from different perspectives.
Despite their reputation, pivot tables are not as complicated as you might think. At their core, pivot tables help:
- Summarize large data sets
- Analyze large data sets
- Explore data insights
- Present those insights in an easy-to-understand format.
These are all crucial elements in your marketing efforts.
How can you tell if your efforts are successful or profitable without crunching the numbers? You can’t.
That’s where pivot tables come into play.
How to Create a Pivot Table
Pivot tables are fantastic tools for analyzing large amounts of data.
I’ll show you how to create them — and how to analyze your marketing data effectively.
Step 1: Find Your Source Data
Before you can make a pivot table, you need to get all your information organized in an Excel spreadsheet.
So, the first step is to figure out what the source of your data is.
Here’s a breakdown of how companies are spending their digital marketing budgets.
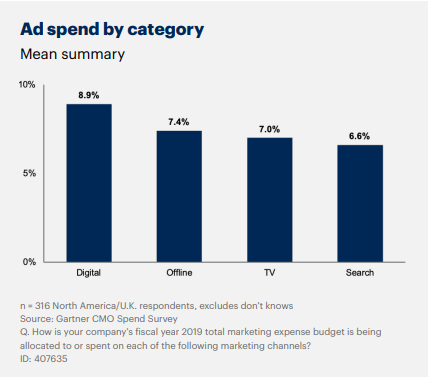
Each of those channels can then be broken down into more categories — digital ad spend might also include social, content marketing, and other digital efforts.
It’s a lot of data — so making sure it’s organized is the first step.
You might also have your data on another platform or software that’s not in Excel.
If you’ve been manually inputting the information into an Excel spreadsheet, chances are it’s already somewhat organized.
However, if your data is somewhere else, like an online marketing tool, you need to get those numbers on a new spreadsheet.
There are a couple of ways you can make this happen.
The first is by manually typing everything. I do not recommend this.
Sure, if you’ve been manually putting figures into an Excel sheet daily or weekly over a long period of time, it’s not the worst idea.
With that said, however, manually typing a year’s worth of data into Excel is not practical (or even realistic in some instances).
Depending on how much data you have, this process could take hours, weeks, or even months. That’s definitely not an efficient use of your time.
If possible, I recommend importing your data.
Step 2: Import Data Into Excel
To save some time and to maximize productivity, you can import data to an Excel spreadsheet. Here’s how:
Open a new Excel spreadsheet, then select the “Data” tab at the top.
Select the import option that fits your data. Your data is probably in a CSV or HTML file format, but all of the choices are a possibility depending on the platform or software you’re using.
For example, if you are uploading data from a CSV file, you’d select “From Text.”
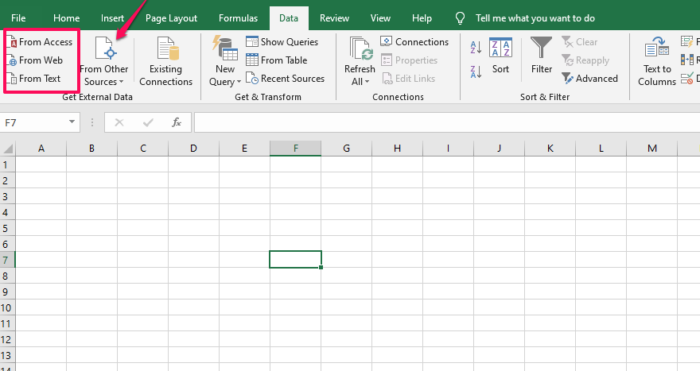
You can also select “From other sources” if you need to upload data from an SQL server or other sources.
Step 3: Clean Up Your Imported Data
While Excel is extremely useful, it’s not always flawless.
It’s possible that your import process didn’t go 100-percent perfect.
Take some time to go through your information and fine-tune any incorrect fields.
For example, columns that are supposed to be a currency, such as USD, may appear as regular numbers.
That’s an easy fix.
Just highlight the cells and select your currency under the “Number” section on the “Home” tab.
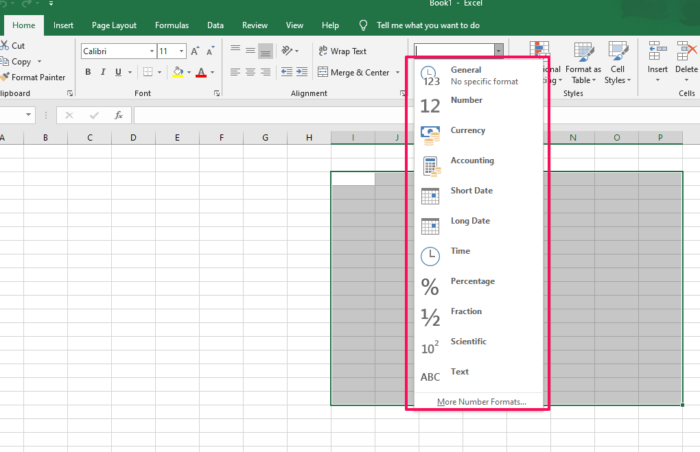
There could be some other minor import problems, but it’s nothing you can’t sort out quickly.
If you’re struggling, Microsoft has a troubleshooting guide to walk you through some common issues.
It’s important to get all your data organized before you attempt to create a pivot table.
For the most part, you may just need to delete some empty rows, columns, or blank cells.
Step 4: Create a Pivot Table
Now that you’ve imported all your information into Excel, you can create a pivot table to organize and compare the data.
Right now, your spreadsheet contains raw data.
To take things a step further, you can create a pivot table to analyze the information.
Here’s an example containing some data about a hypothetical sales team.
Select the Data You Want to Analyze

This raw data is great information, but what can you do with it? Not much.
You don’t know the total order amount for each salesperson, and you don’t know the total for all the orders.
If you want to analyze your marketing campaign, these are important pieces of information.
First, narrow down the data.
You don’t need to select the entire spreadsheet to create a pivot table.
For example, the screenshot above may contain additional columns for the date of each sale or the customer’s home address.
However, that’s not necessary to compare the sales team and their monthly order amounts.
Just go with the important information.
Highlight all of the cells containing the data, including the headers for each column.
Choose “Pivot Table” from the “Insert” Tab

This will create the table.
Select the Data You Want to Add to Your Table
By default, your pivot table will open in a new worksheet tab.
I recommend leaving it that way.
It can get messy and tough to read if you put your pivot table on the existing worksheet with all your data.
If you need to refer to your datasheet, it’s easy to switch back and forth between tabs.
Since you’ve previously highlighted the information in the spreadsheet, the “Select a table or range” option is already marked.
Open the New Worksheet Tab

The new worksheet will automatically be labeled “Sheet 2,” but you can rename this to anything that helps you stay organized.
Notice the top right section of the screen.
The pivot table fields section contains all the headers we highlighted back in the first step.
Remember how I said to only select the important information from your data source?
Well, now you have the option to narrow those choices down even more.
Choose the Fields for Your Pivot Table

For this example, we’ll select the “Salesperson” and “Order Amount” fields.
Drag the Fields to the Desired Area

You can put a selected field into one of four areas.
- Filters
- Columns
- Rows
- Values
For this example, I put the “Salesperson” field under “Rows” and the “Sum of Order Amount” under the “Values” section.
Change the Value Field
If you want to summarize the value field by something other than the sum, you have some options.
Just click the value field settings, and you can adjust the calculation.
For this example, the only other relevant option would probably be an average.
However, I’ll leave it as the sum for now.
View Your New Pivot Table

Take a minute to assess what we’ve accomplished here.
Remember how our data looked back in the first step? If not, take a second and scroll back up.
It’s much easier to analyze the information now.
Each salesperson is only listed once, and their total sales are calculated for you.
You can even see the grand total from your entire sales force.
We turned the raw data from the initial spreadsheet into an organized pivot table.
Pivot the Data
Let’s say you want to see the total order amounts each month.
You don’t need to start from scratch.
This information is easily attainable with a few simple clicks.
Just uncheck the salesperson box and click on the month field instead.
Make sure the “Month” field appears in the “Rows” section on the bottom right of your screen.
That’s it.
The data is calculated for you in seconds.
Continue to mix and match which boxes you want checked off depending on the information you’re trying to analyze.
You can also take advantage of other analysis tools while you’re evaluating the data.
Step 5: Analyze Your Results
Now that you’re an expert in creating pivot tables, it’s time to apply that information to your business.
What should you be looking for?
All your data should help you scale and measure the results of your marketing campaign. For example, you might ask questions like:
- Is it effective, or is it burning a hole in your company’s checking account?
- All your data should come back to the user experience.
- Where do your customers hear about you?
- What’s driving sales?
- Which marketing efforts are translating to high-conversion rates?
Try to use the results from your data to maximize your conversion rate optimization.
One of the best ways to analyze your marketing data is with visual aids.
Take a look at this example from Chandoo. These graphics were made with a pivot table and slicers.
These make it much easier to understand data trends, right?
If you’re presenting the information in your pivot table to your sales force, marketing team, or accounting department, you can use visuals like these to convey your message.
Sure, the pivot table is great. We’ve already established that.
But you can take the information from your table one step further if you’re giving a presentation.
How? With a pivot chart.
Step 6: Create a Pivot Chart
To keep things simple, I’ll continue with the same hypothetical data from the example we used earlier.
Click any Cell in Your Pivot Table
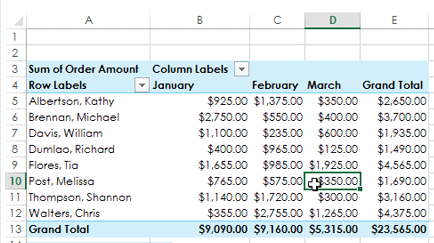
It doesn’t matter if it’s a word, number, total, or header.
Just make sure a cell within the table is highlighted.
Go to the “Analyze” tab in the Top Ribbon

Then click on the PivotChart icon.
Choose a Chart From the List

I’m selecting a clustered column for this data set. It’s a good visual representation of the information over three months.
When you’re doing this, feel free to choose any option.
With that in mind, it’s best to keep it simple, especially if you’re giving a presentation.
Analyze the Chart

It’s a great visual aid to measure performance and compare it to your marketing strategy.
Let’s dive a little deeper into this information.
Michael Brennan had an outstanding month of January.
In fact, it was the highest-performing month out of every sales team member in the data set.
What caused him to drop off so drastically over the next two months?
It could be based on several factors, but let’s play out a couple of reasonable scenarios.
It could be a marketing issue. Compare this information to what changed in his region over these months.
Did you scale back your marketing efforts? Did you change your strategy?
You need to create an effective marketing strategy and stick to the plan.
If you changed something on your e-commerce website, it could impact your data as well.
Here’s a video where I explain how to optimize your e-commerce product pages.
Maybe Michael lost motivation, and his numbers dropped as a result.
Motivated employees tend to work harder, which results in a higher customer satisfaction rate and better productivity.
If Michael has already met his maximum commission quota for the quarter, he won’t be as motivated to continue selling your product.
To fix this problem, you might give your employees uncapped commissions or find other ways to keep your staff motivated.
You need to motivate your personnel to keep your team tightly aligned.
Outside of financial motivation, here are the top reasons employees stay motivated, according to KMI Learning.
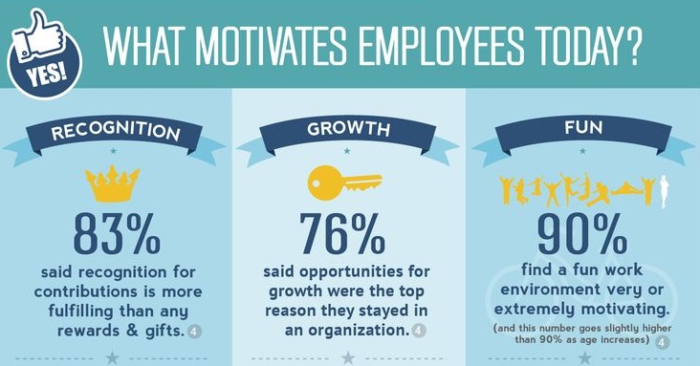
What can we learn from this?
Sure, the numbers we used to create the pivot table, and pivot chart was hypothetical.
But they still speak volumes to scenarios you may encounter while analyzing your own data.
It’s not always a lack of advertising or error in the marketing department that impacts your sales numbers.
There are other external factors to take into consideration while you examine these figures.
Here’s something else to consider about your marketing data.
You need to have clear goals set, so you know what to measure and analyze.
Write down your marketing goals.
These are the steps you need to take to analyze your marketing data effectively.
- Set your goals and objects.
- Manage your data (using a pivot table).
- Analyze and report (with a pivot chart).
When you break it down into these three simple steps, it’s really not that difficult.
Conclusion
Data is an essential component of a successful marketing campaign.
And it’s underutilized by most businesses.
How can you effectively analyze your marketing data?
First, you need to get all your information organized in Microsoft Excel.
From here, you can easily create a pivot table that will turn your raw data into something you can analyze to evaluate your marketing campaign.
Then take this evaluation one step further with a pivot chart. It’s a simple process that only takes a few extra clicks.
Pivot charts aren’t as complicated as they sound.
Now that you’re familiar with making them and using them as a marketing tool, you can get started analyzing your data to better understand the effectiveness of your marketing plan.
You’ll have it done in minutes. Then, use these Excel hacks to take your marketing even further.
What data will you use to create your first pivot table? What might you learn about your marketing efforts?
The post The Simple Guide to Using Pivot Tables to Understand Marketing Data appeared first on Neil Patel.
source https://neilpatel.com/blog/pivot-table-for-marketing-data/


